
Time: About 45 minutes
From a product to a finished report
This is one complete pass through TRA Studio: you create a product, set up the
TRA that assesses it, model the system, let the tool derive the threats, decide
what to do about one of them, and print the report. Everything else in the
product is a variation on this loop.
Allow about 45 minutes the first time. You need an account and nothing else —
no diagram file, no prepared data.
This page is about the tool. For the method behind the clicks — what a TRA is
for, when to run it, and what makes one defensible — read
Building your first TRA, which is the same work
without a single screenshot.
The example is a made-up device: SensorBridge G200, an industrial IoT
gateway from the equally made-up Acme Automation GmbH. It reads field sensors
over Modbus RTU and forwards their readings to the customer's cloud over MQTT.
Swap in your own product as you go; the steps do not change.
Before you start: what the tool covers
The first time you sign in, TRA Studio tells you what it does and does not do
for the CRA. It is worth reading rather than clicking away: it is the honest
boundary of the evidence you are about to produce.
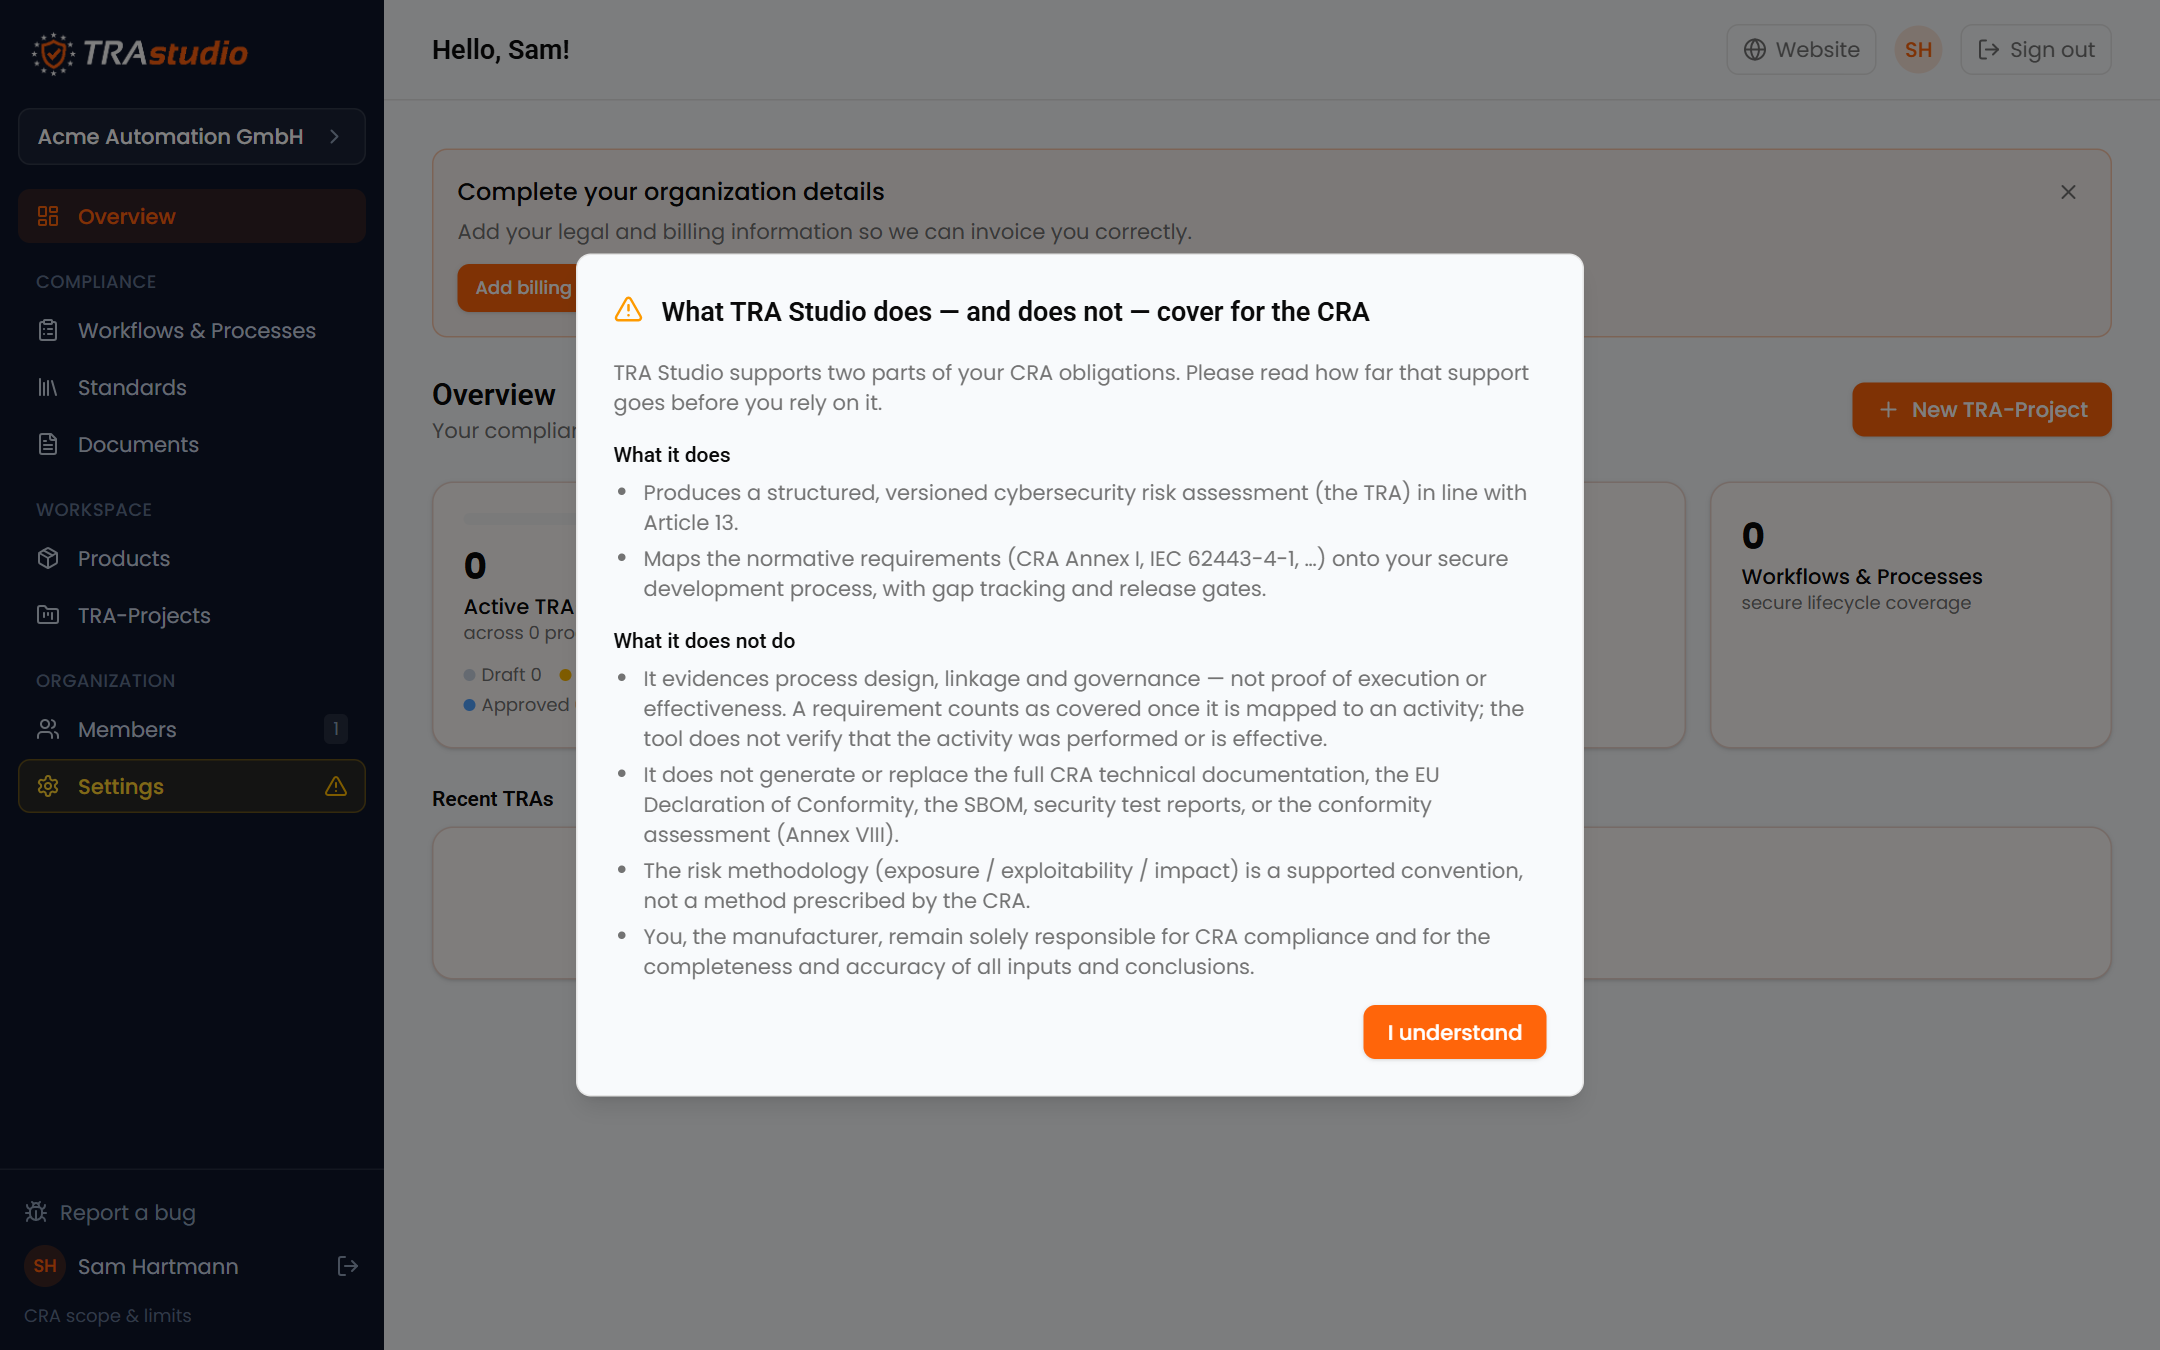
In short: the tool produces the Article 13 risk assessment and maps normative
requirements onto your development process. It does not write your technical
documentation, your Declaration of Conformity or your SBOM, and it evidences
that a process exists — not that it was followed.
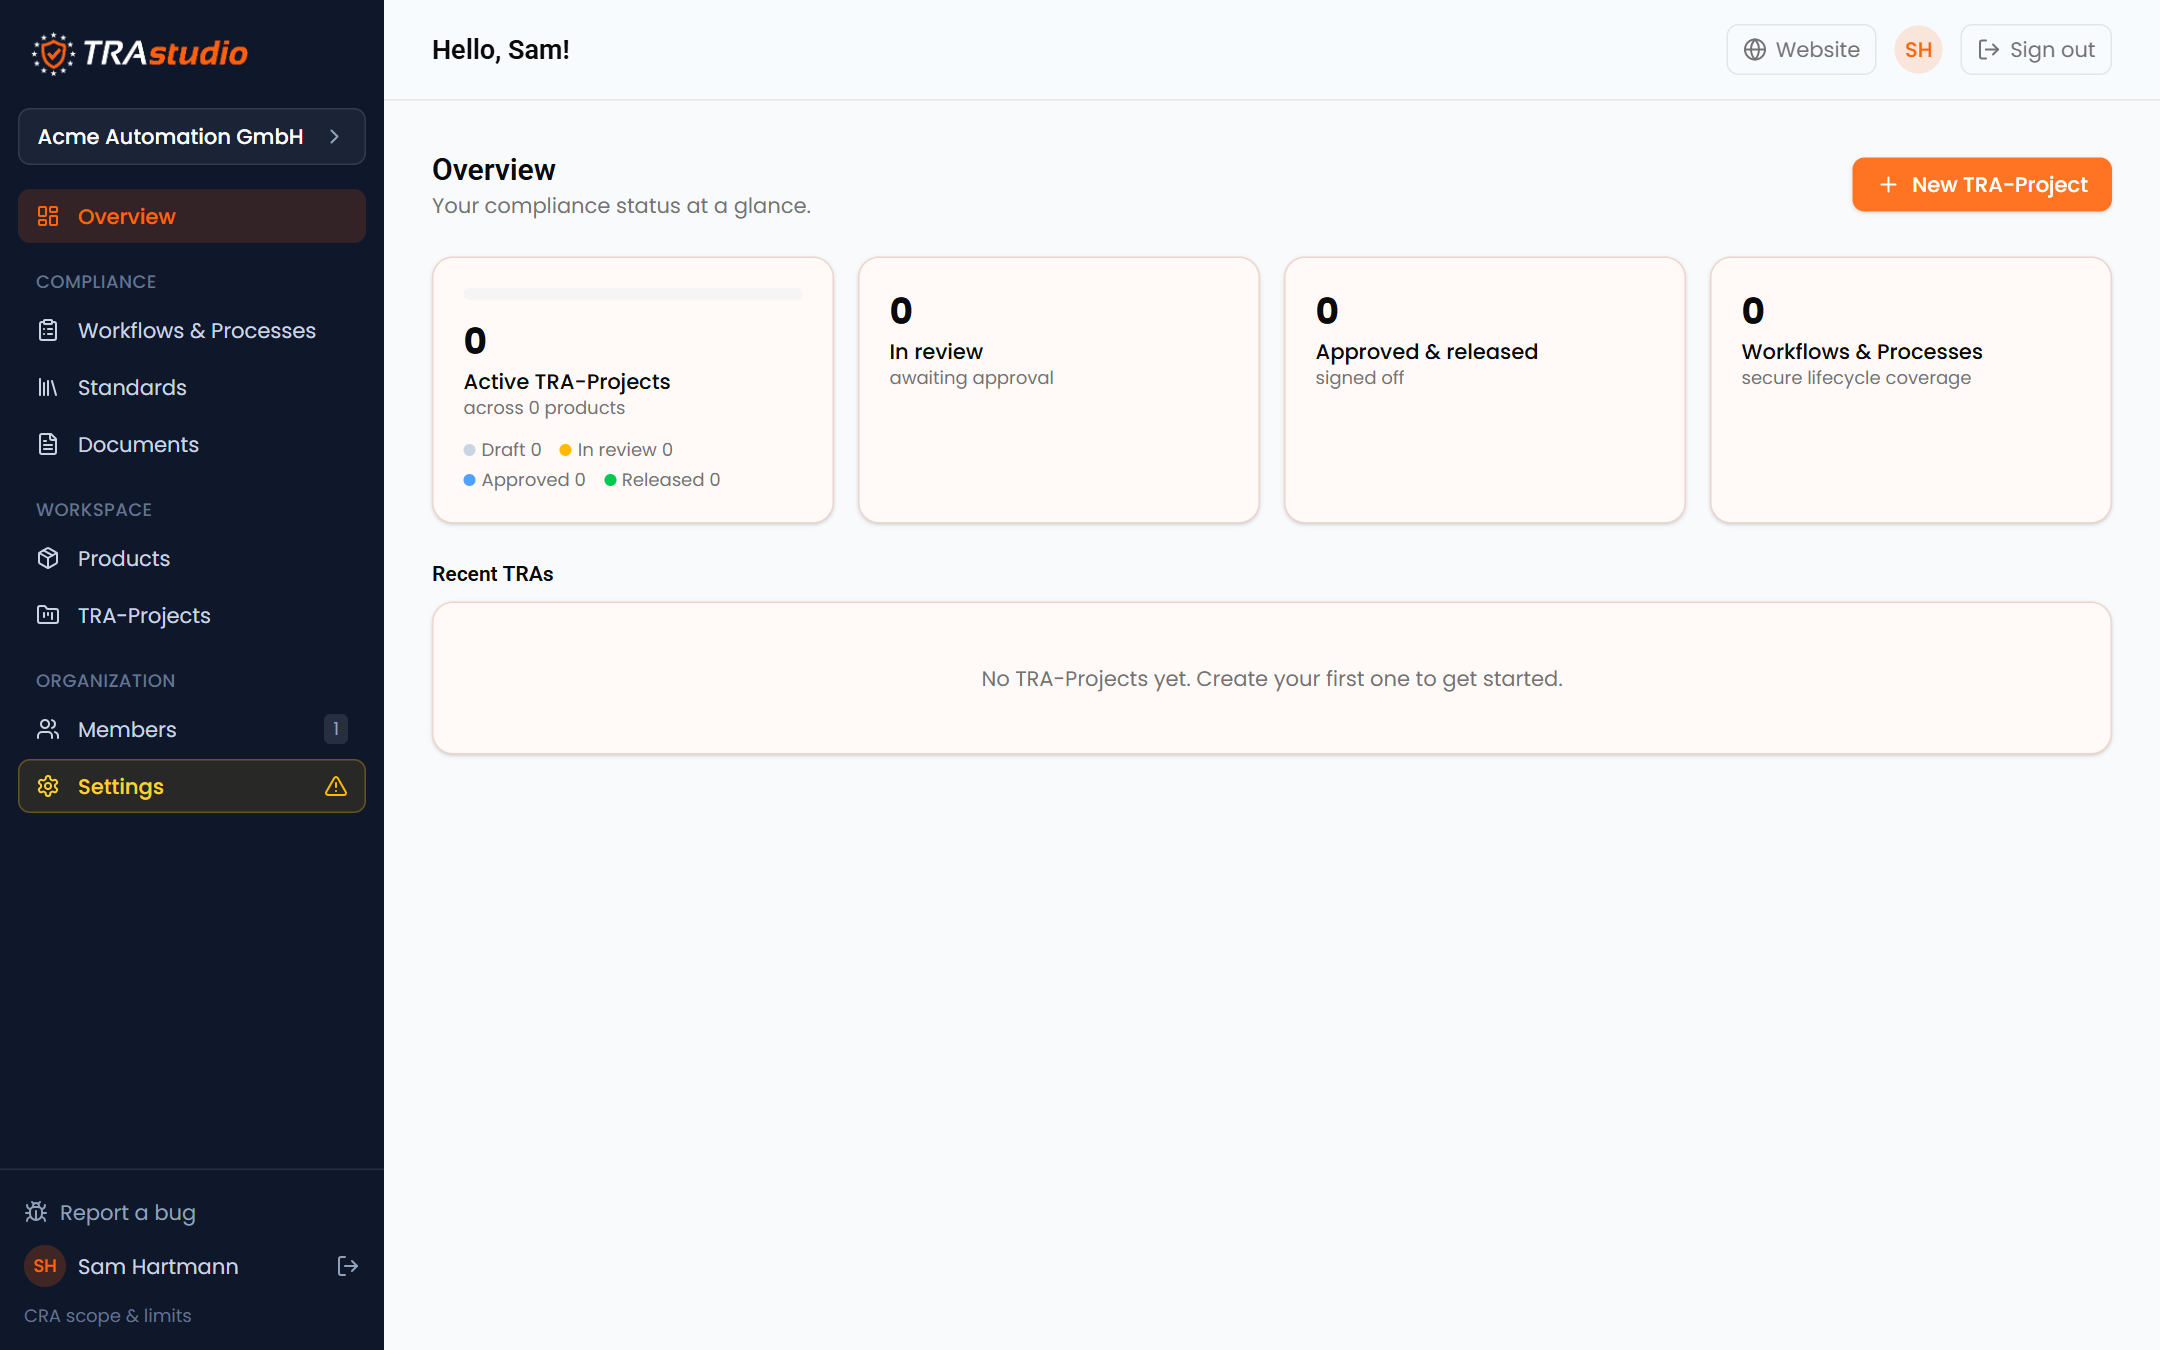
Accept it and you land on the overview. Empty, because nothing exists yet.
Step 1 — Create the product
Everything in TRA Studio hangs off a product. Open Products in the sidebar
and choose New product.
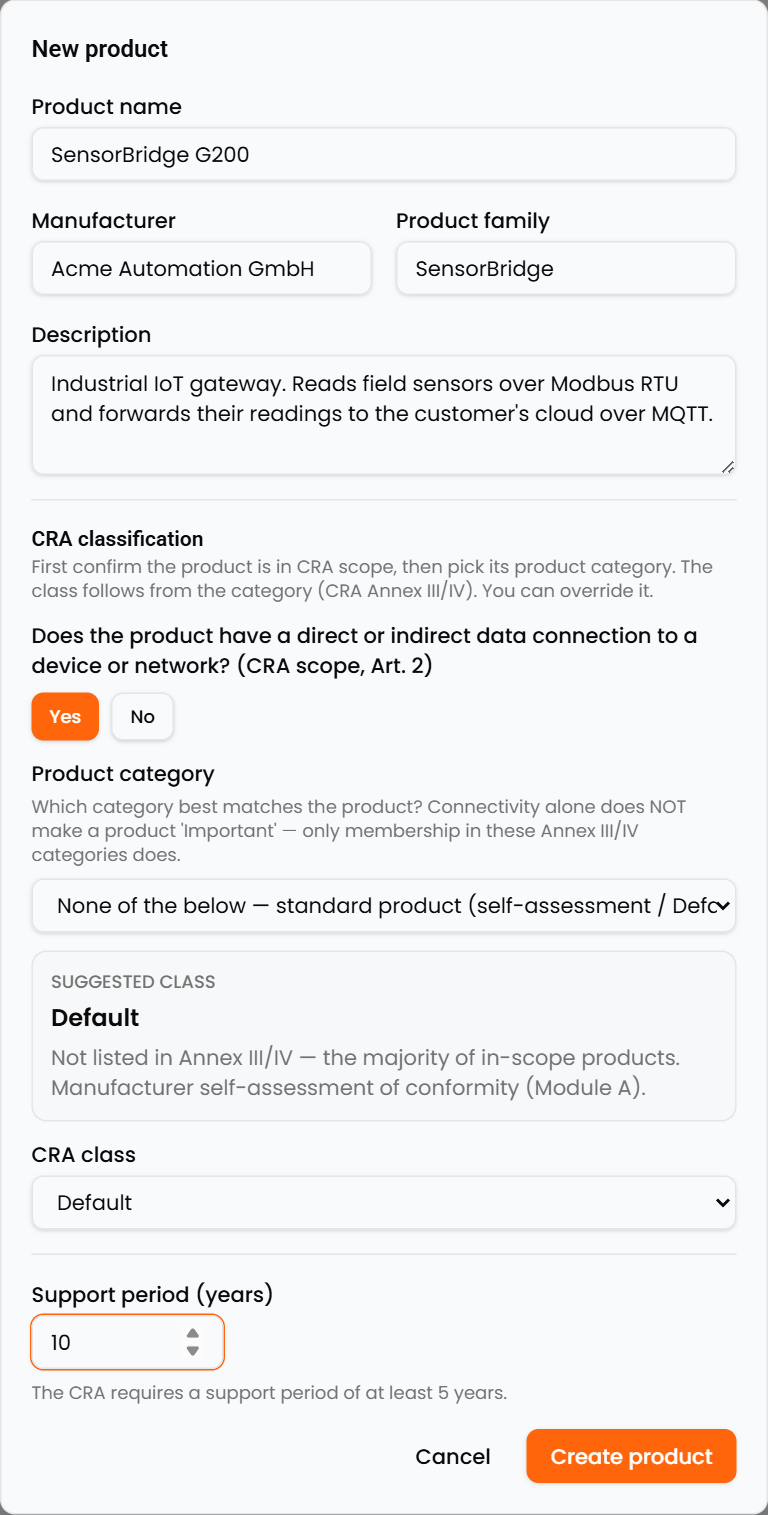
Fill in the name, the manufacturer and — optionally — a product family, which
is what later groups variants of the same device together.
Then the CRA classification, in two moves:
- Is it in scope? A product is in CRA scope if it has a direct or indirect data connection to a device or network (Art. 2). Our gateway does, so: Yes.
- Which category is it? Pick from the Annex III/IV list. Connectivity alone does not make a product "Important" — only membership in one of those categories does. A sensor gateway is in none of them, so it is "None of the below — standard product", and the suggested class is Default: self-assessment, Module A.
Finally the support period. Five years is the CRA minimum; we promise ten.
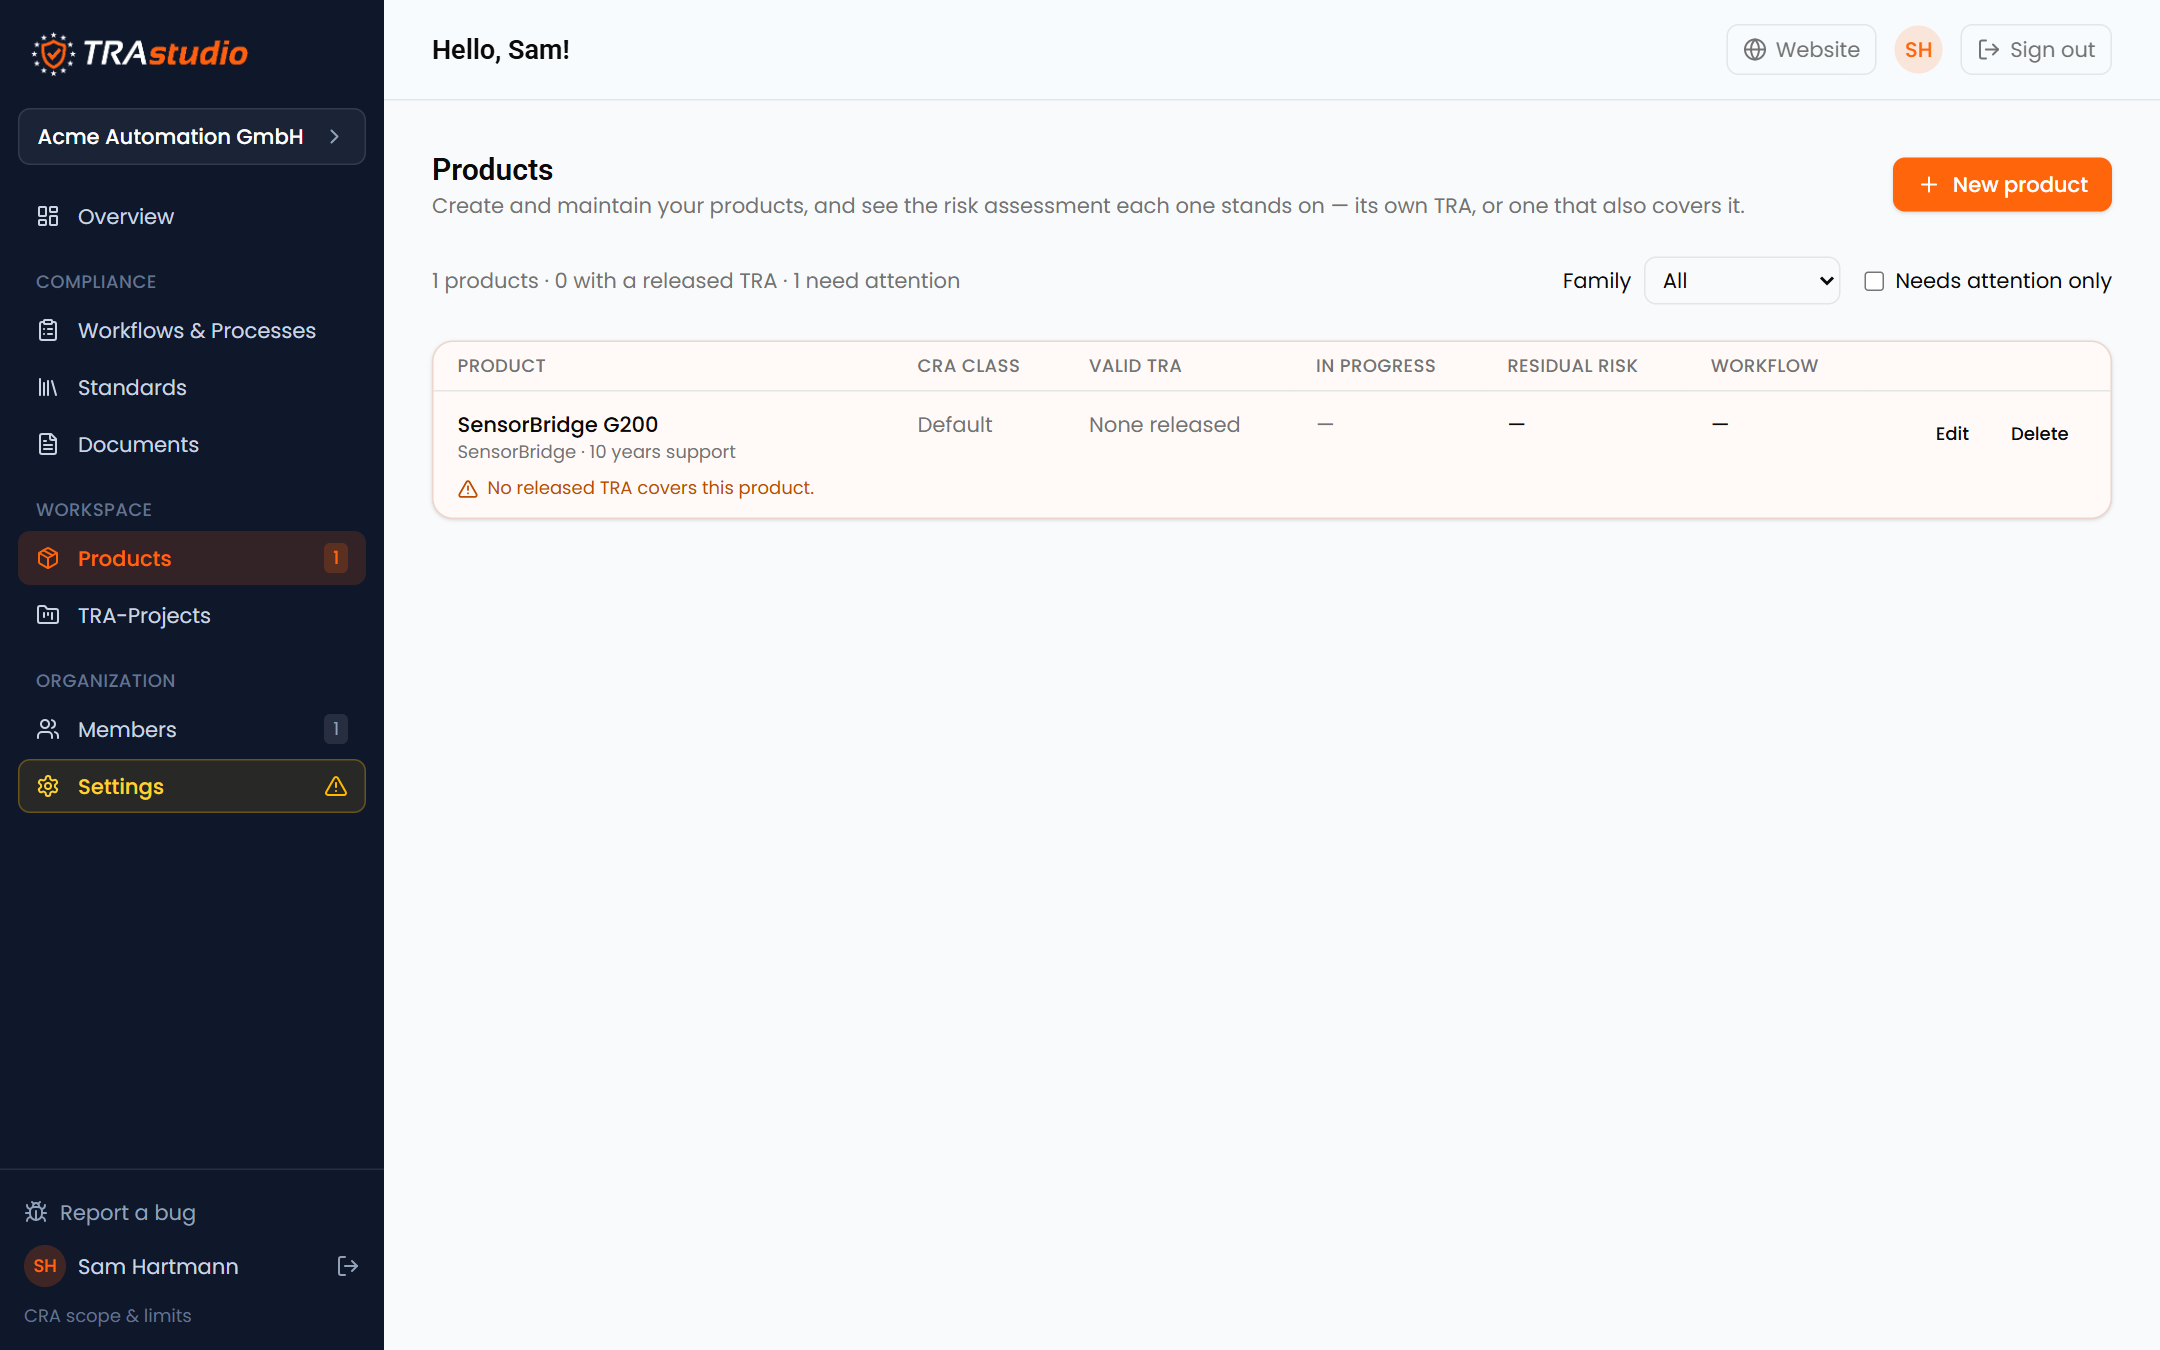
Create product. The product appears in the list with an amber note: no
released TRA covers it yet. That note is the whole point of the Products page —
it is the view that tells you which of your devices are still uncovered.
Step 2 — Set up the TRA project
A product is what you sell. A TRA project is the assessment about it, with
its own version, members and sign-off. Go to TRA-Projects → New TRA-Project.
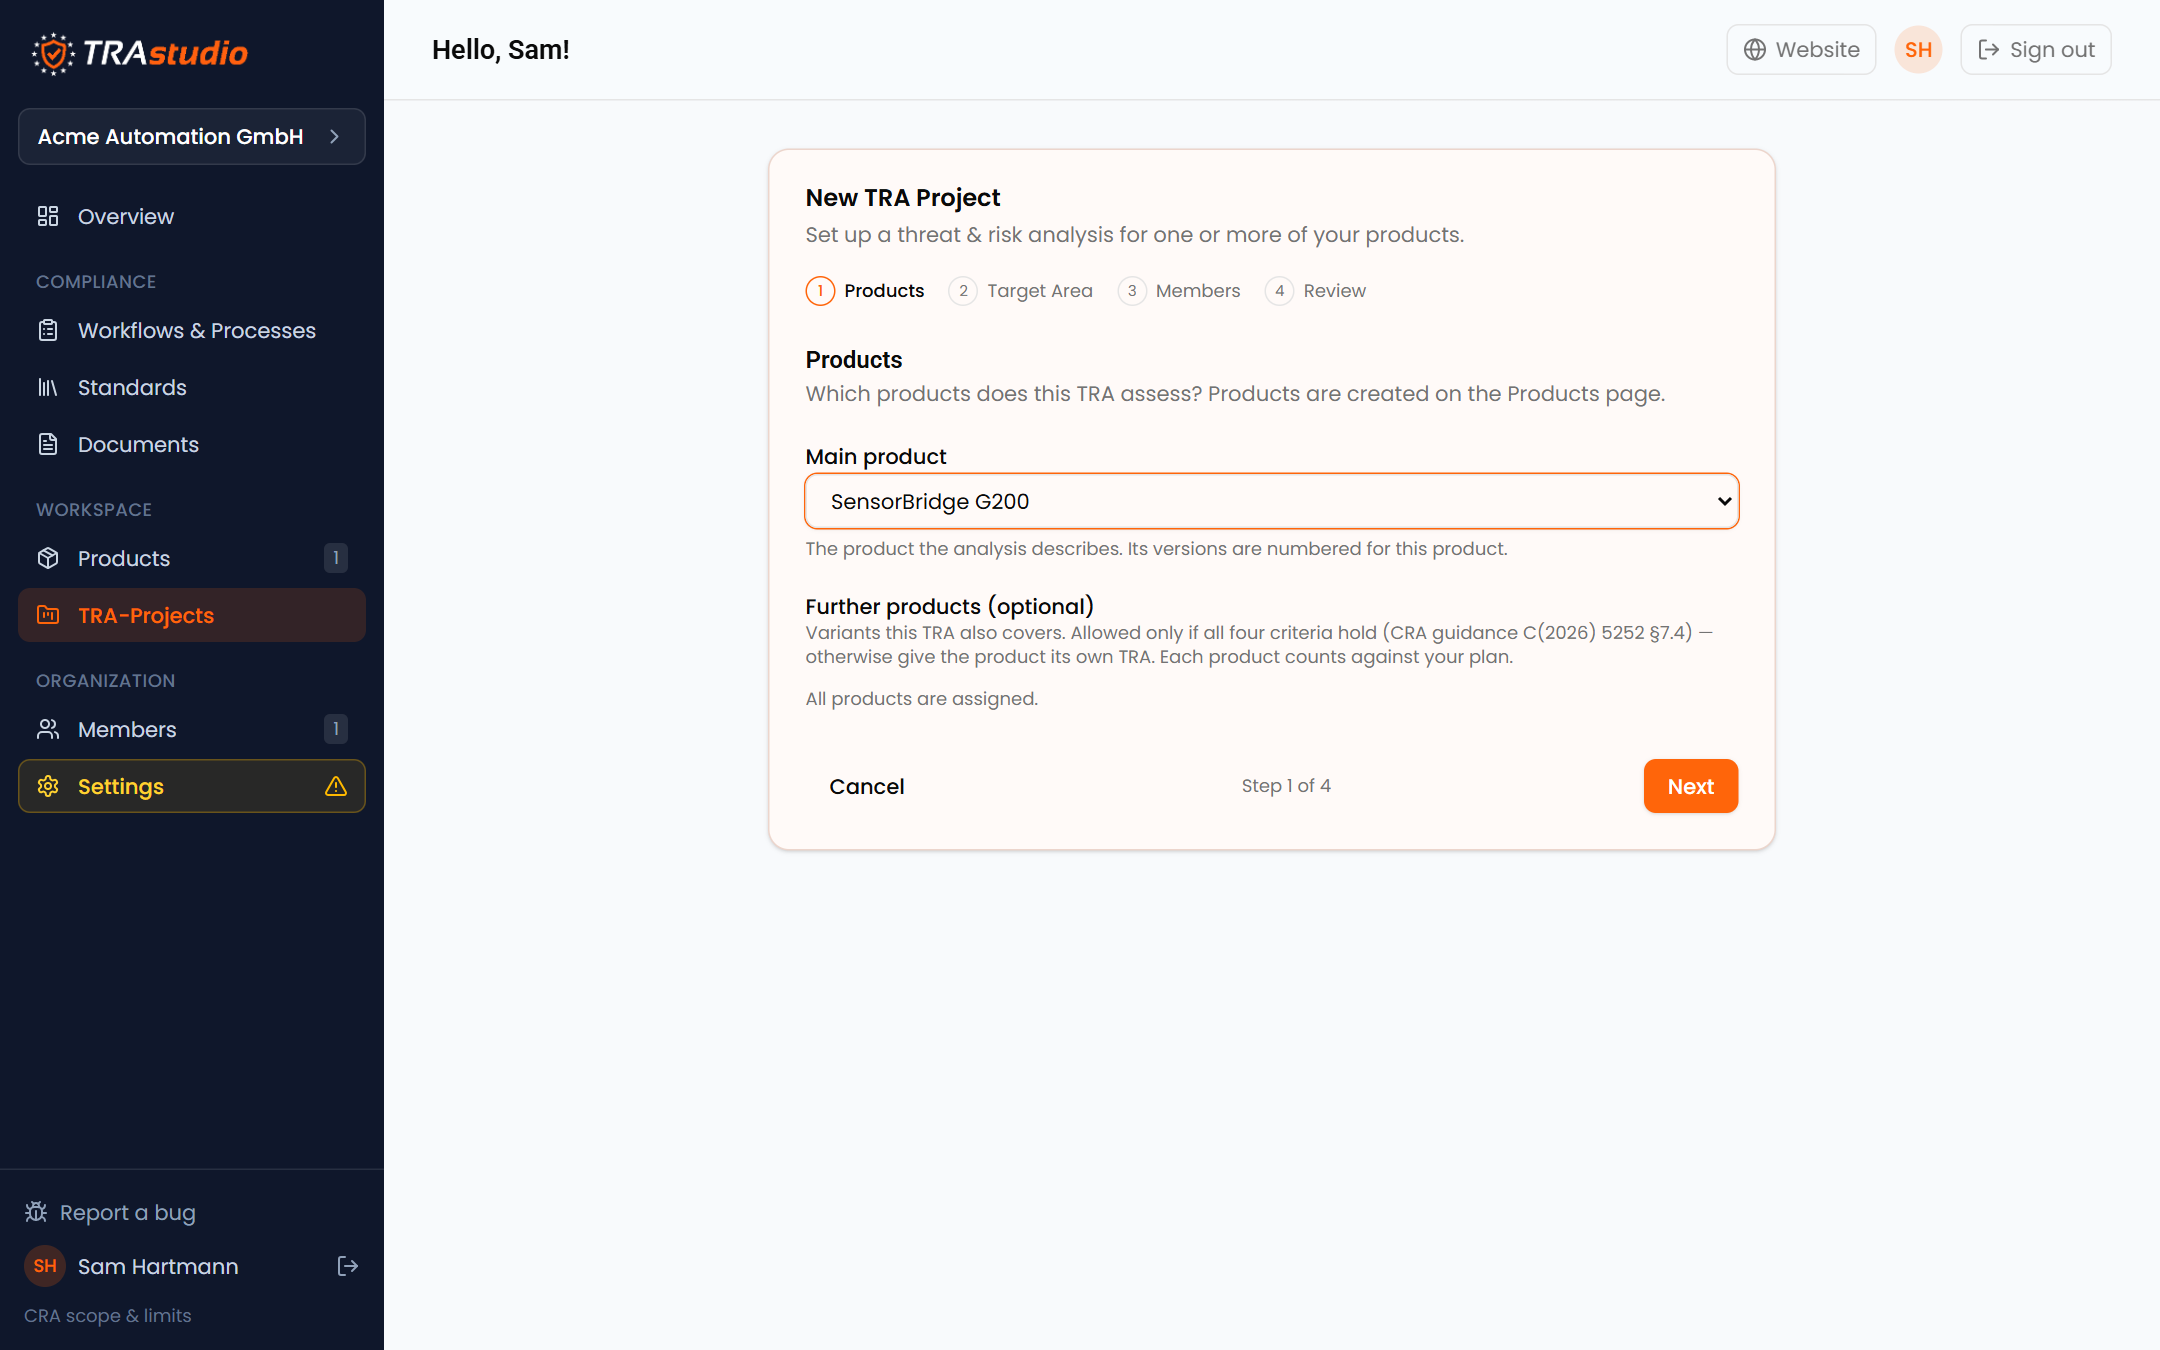
Products. Pick the main product — the one the analysis describes. You can
add further products here if a single TRA legitimately covers several variants;
leave that empty for now.
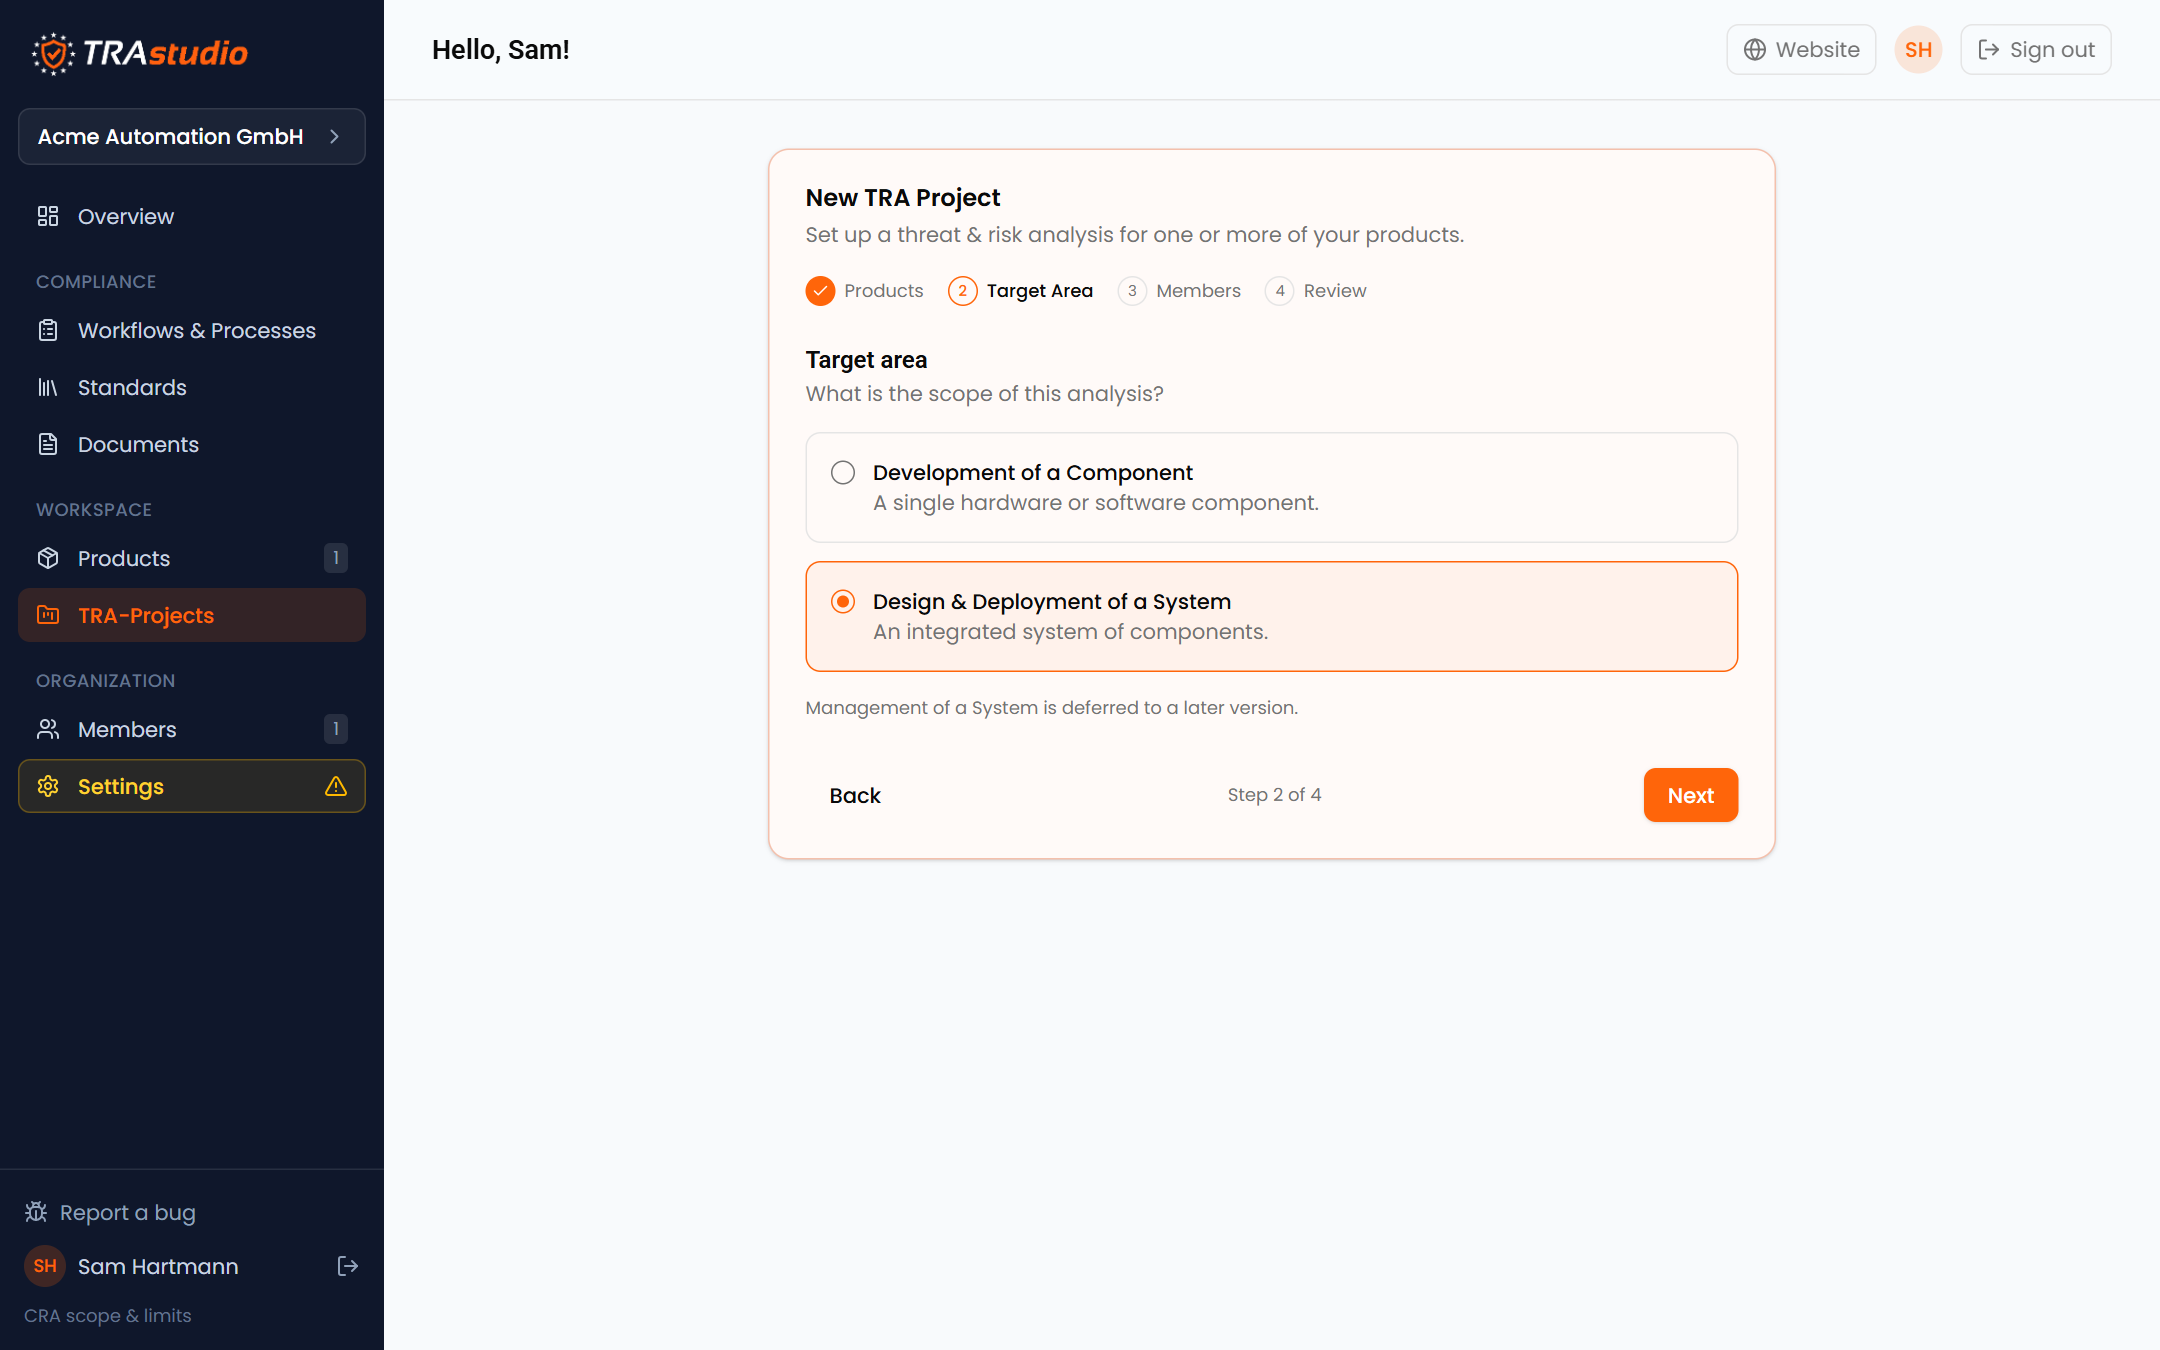
Target area. Development of a Component is for a single piece of hardware
or software. Design & Deployment of a System is for an assembly of components
that talk to each other. Our gateway is analysed together with the sensors,
the cloud and the service laptop around it, so: a system.
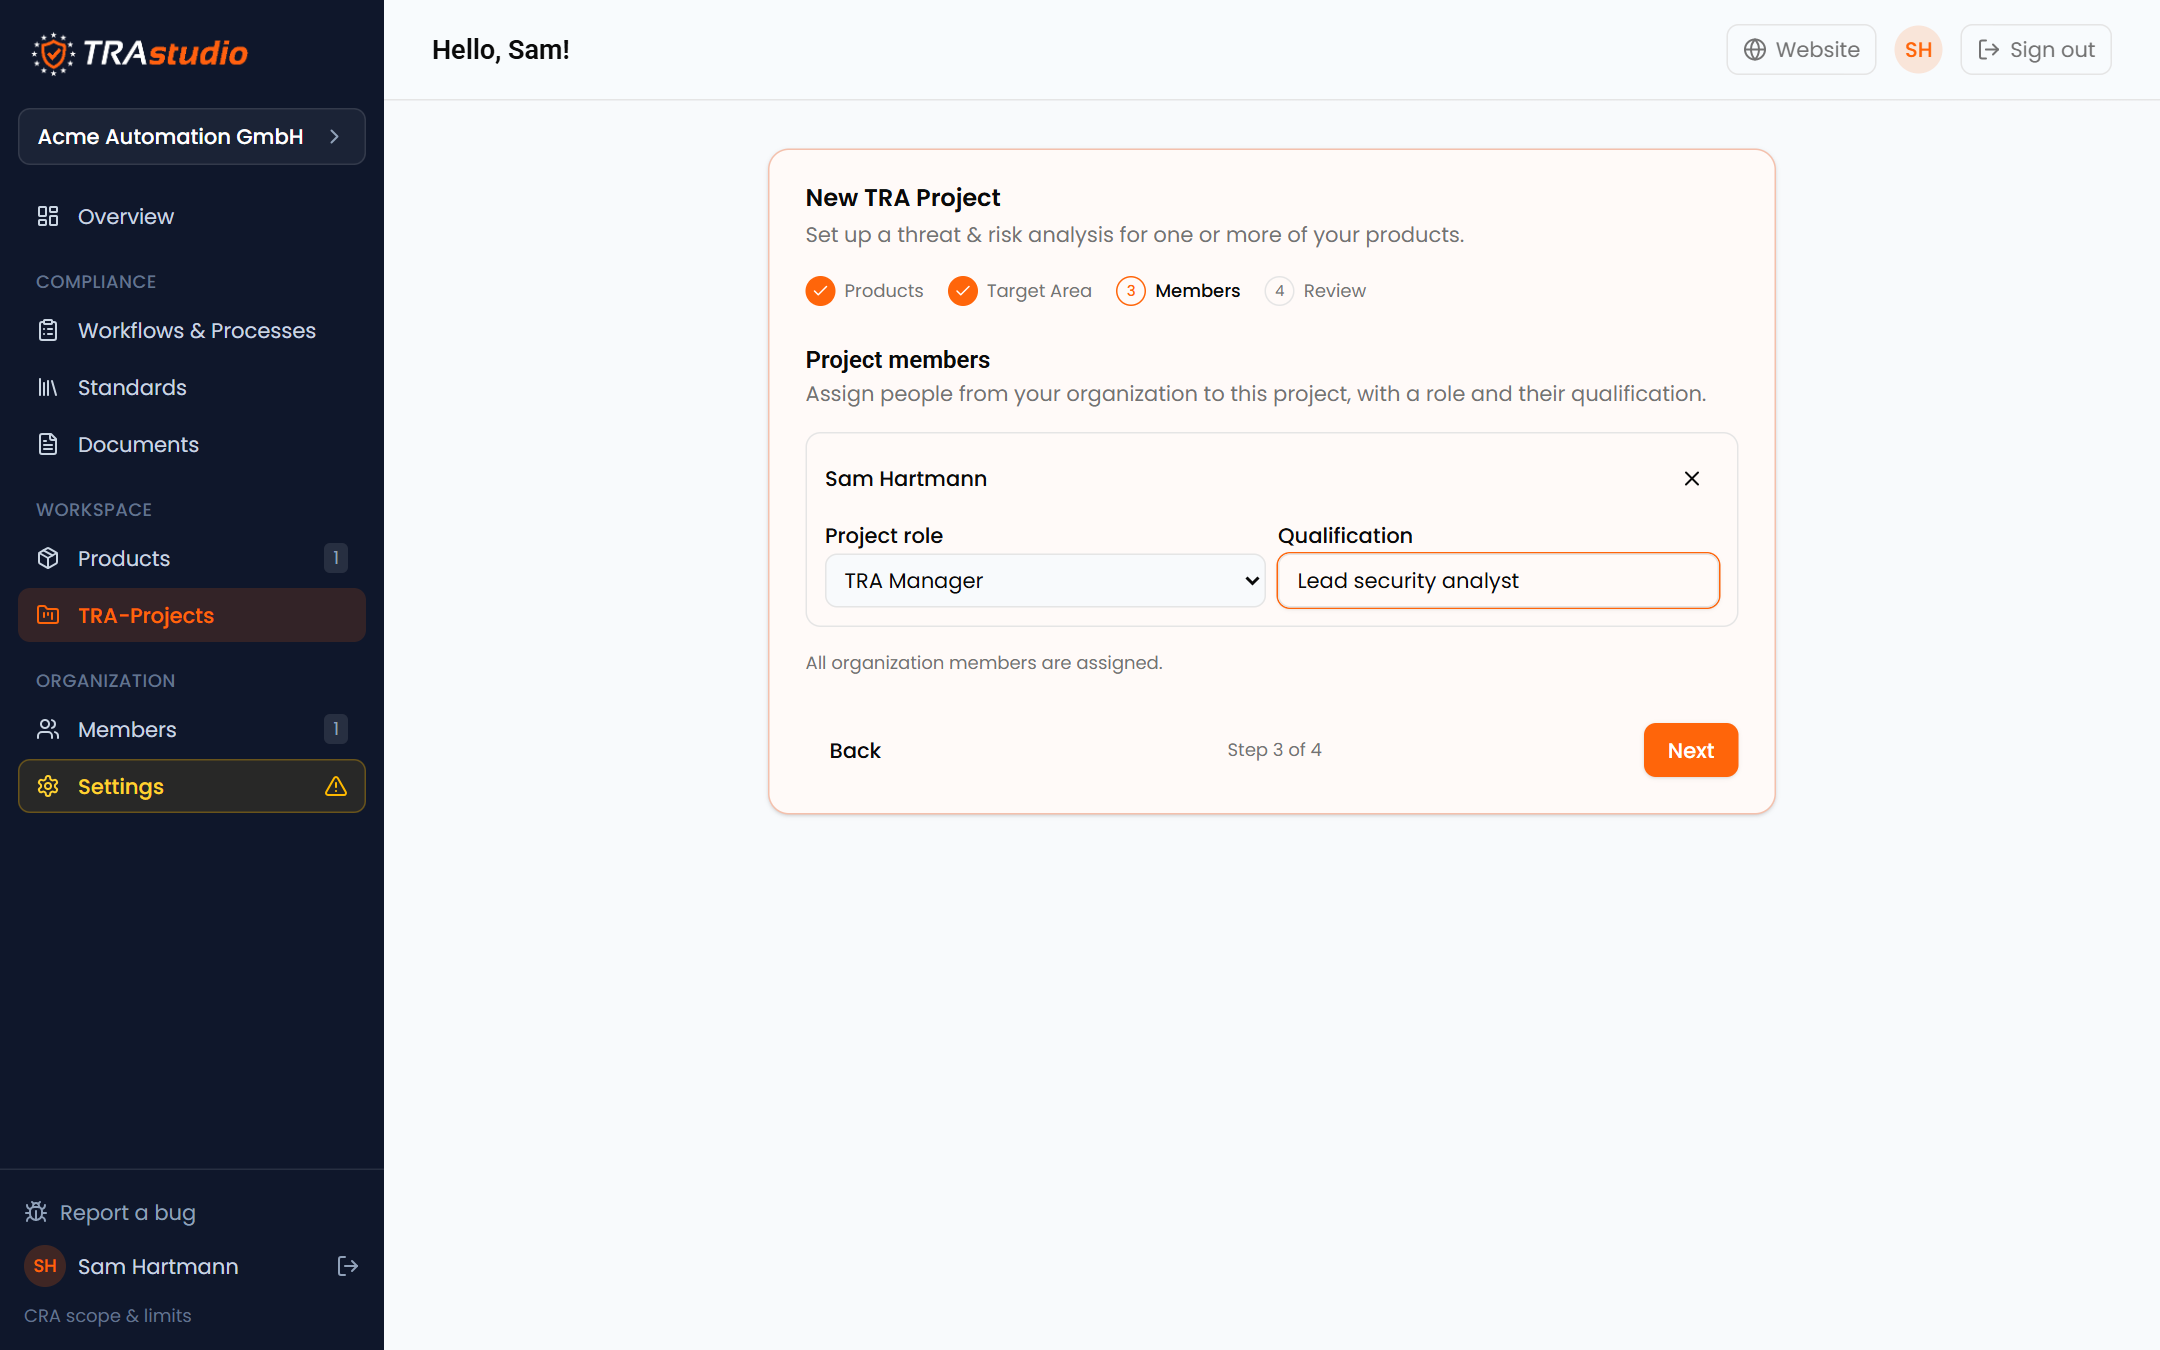
Members. Assign the people who will work on it, each with a project role and
a qualification. The qualification is not decoration: an assessment is only as
defensible as the competence behind it, and this is where you record it.
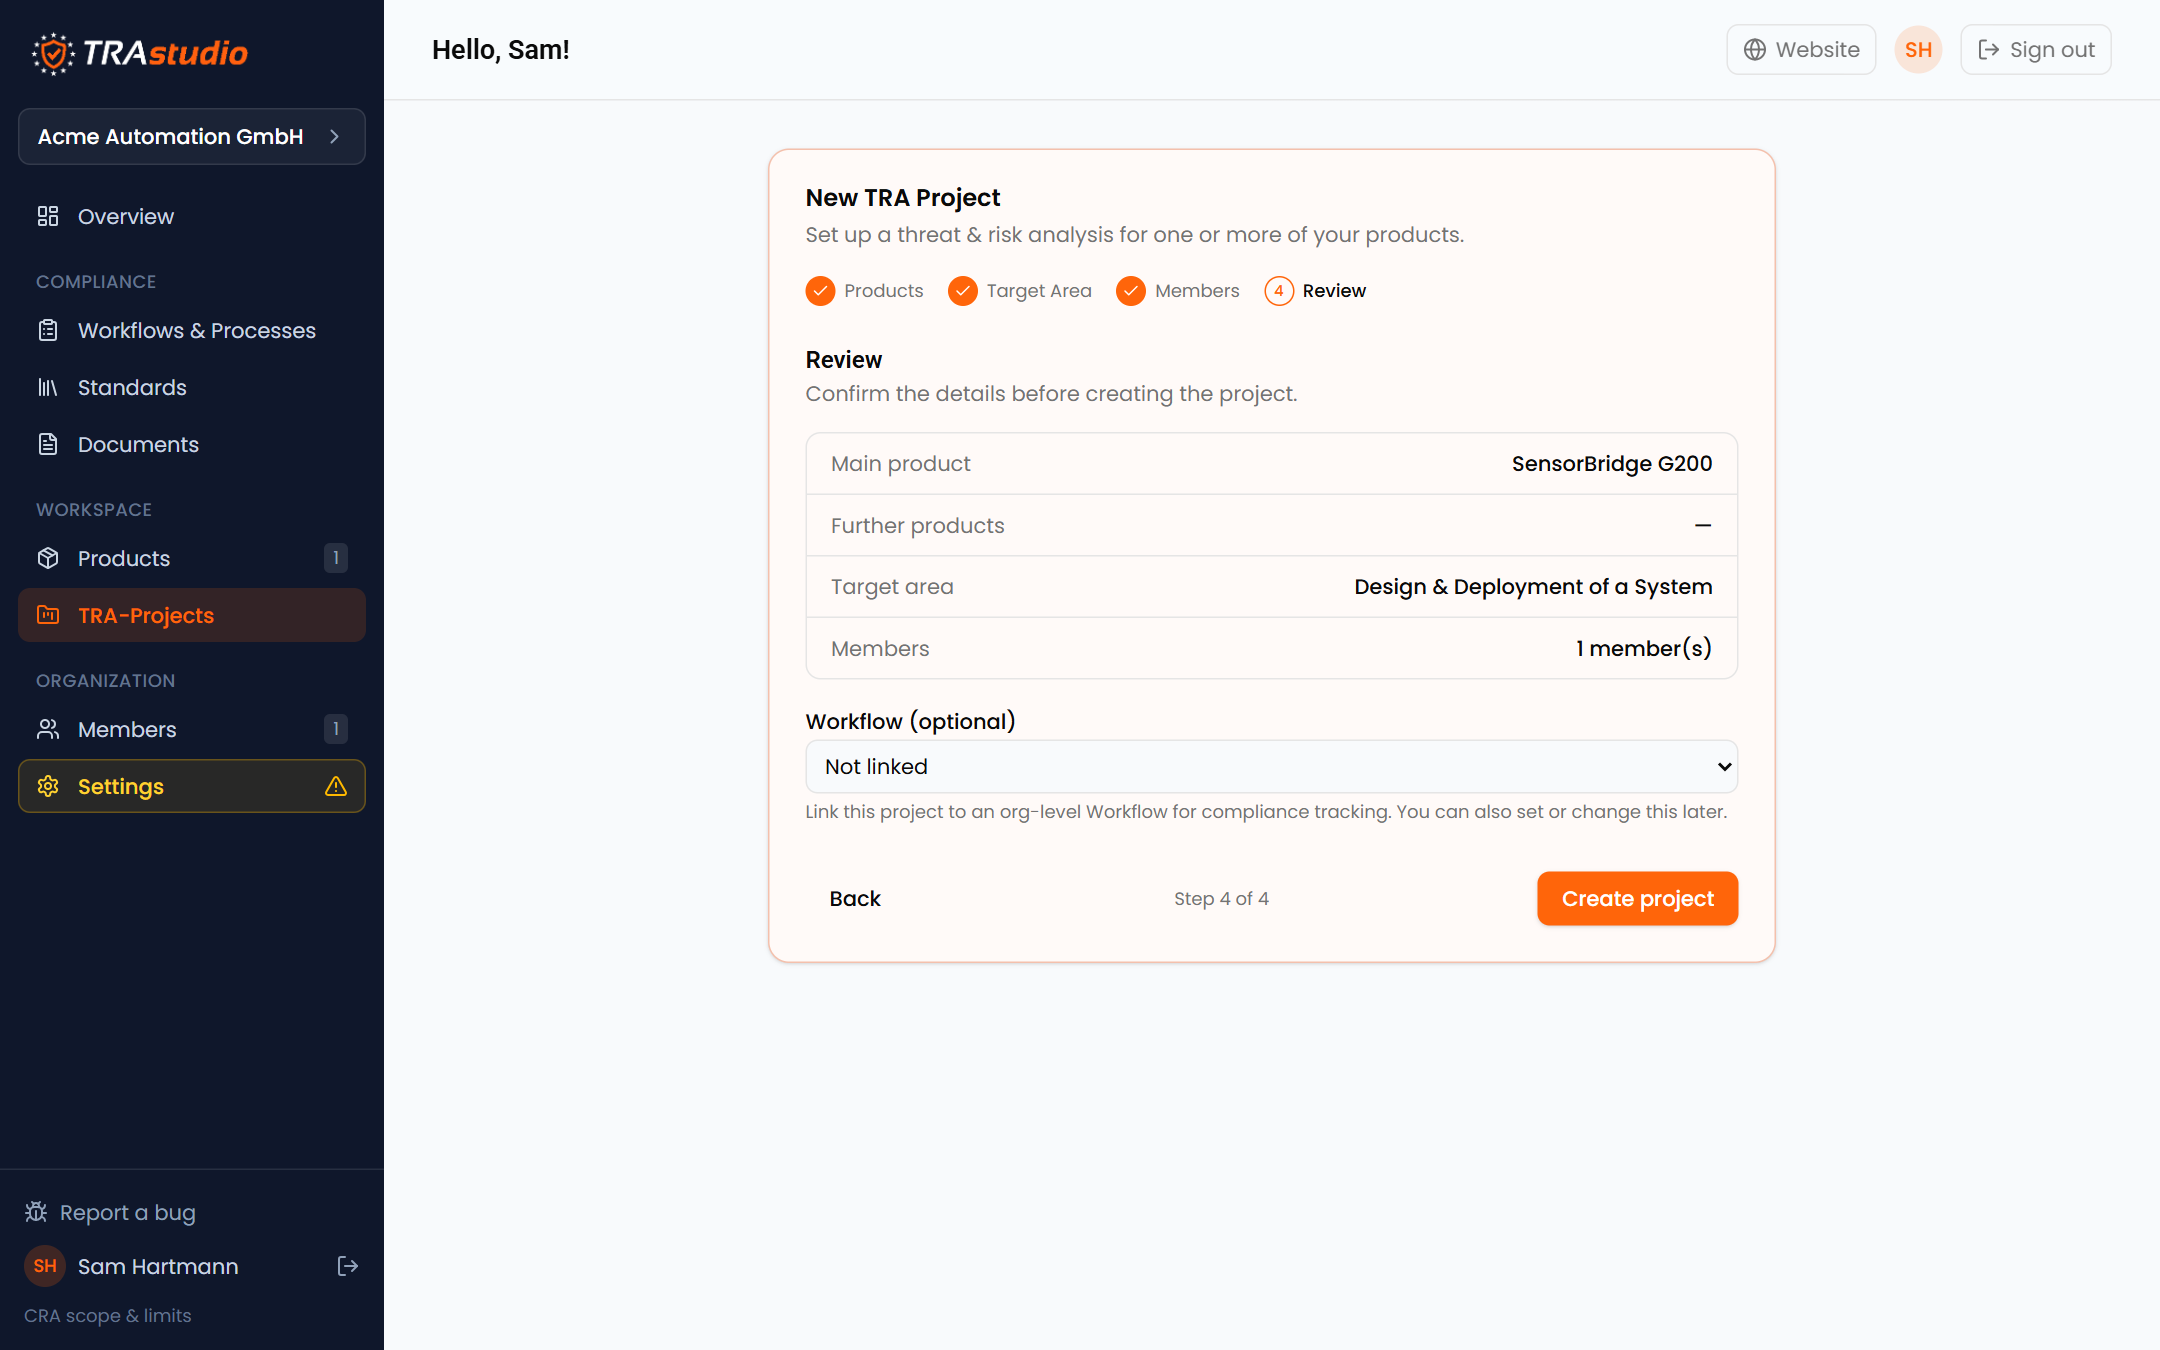
Review. Check the summary and create the project. The workflow link can stay
empty — that is for connecting the TRA to an organization-level secure-SDLC
workflow, which is a separate tutorial.
Step 3 — Say what the assessment covers
The project opens on System Overview. Scroll to the scope statement and
write three things: what is in scope, what is explicitly out, and which other
TRAs the excluded parts belong to.
Do not skip this because it is prose. Almost every argument later in a TRA turns
out to be an unspoken disagreement about scope, and an assessor reads this
paragraph first.
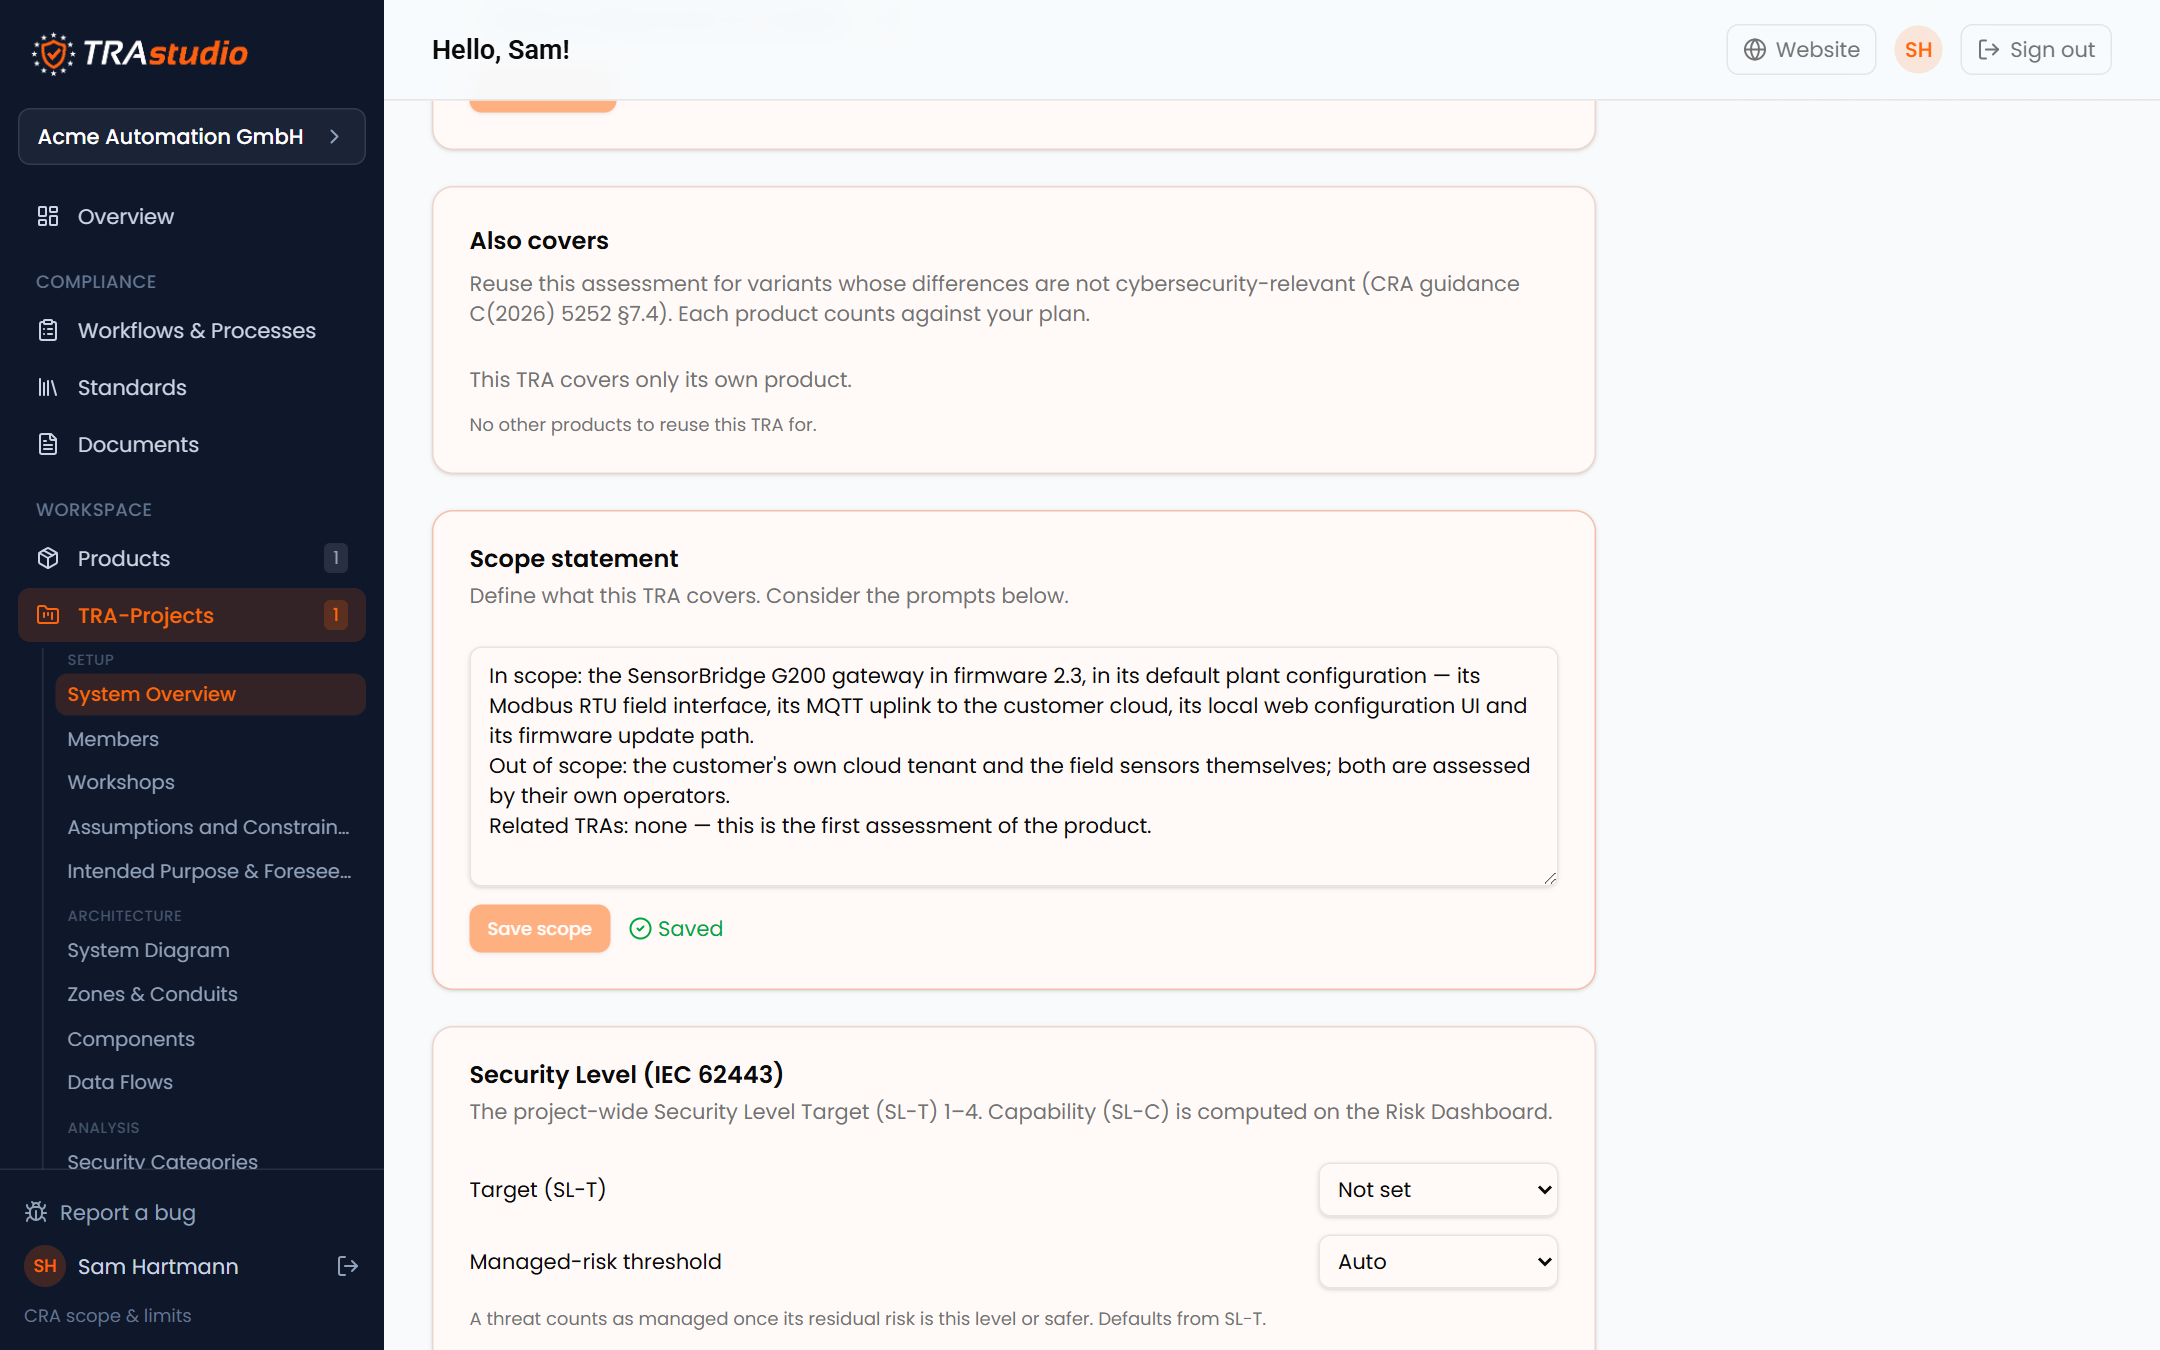
While you are here: the Security Level (SL-T) and the
managed-risk threshold are also set on this screen.
Both can wait until you have seen your first set of risks.
Step 4 — Model the system
Open System Diagram. This is the model the analysis is derived from, so it
only has to be good enough to answer one question: *what crosses a trust
boundary?*
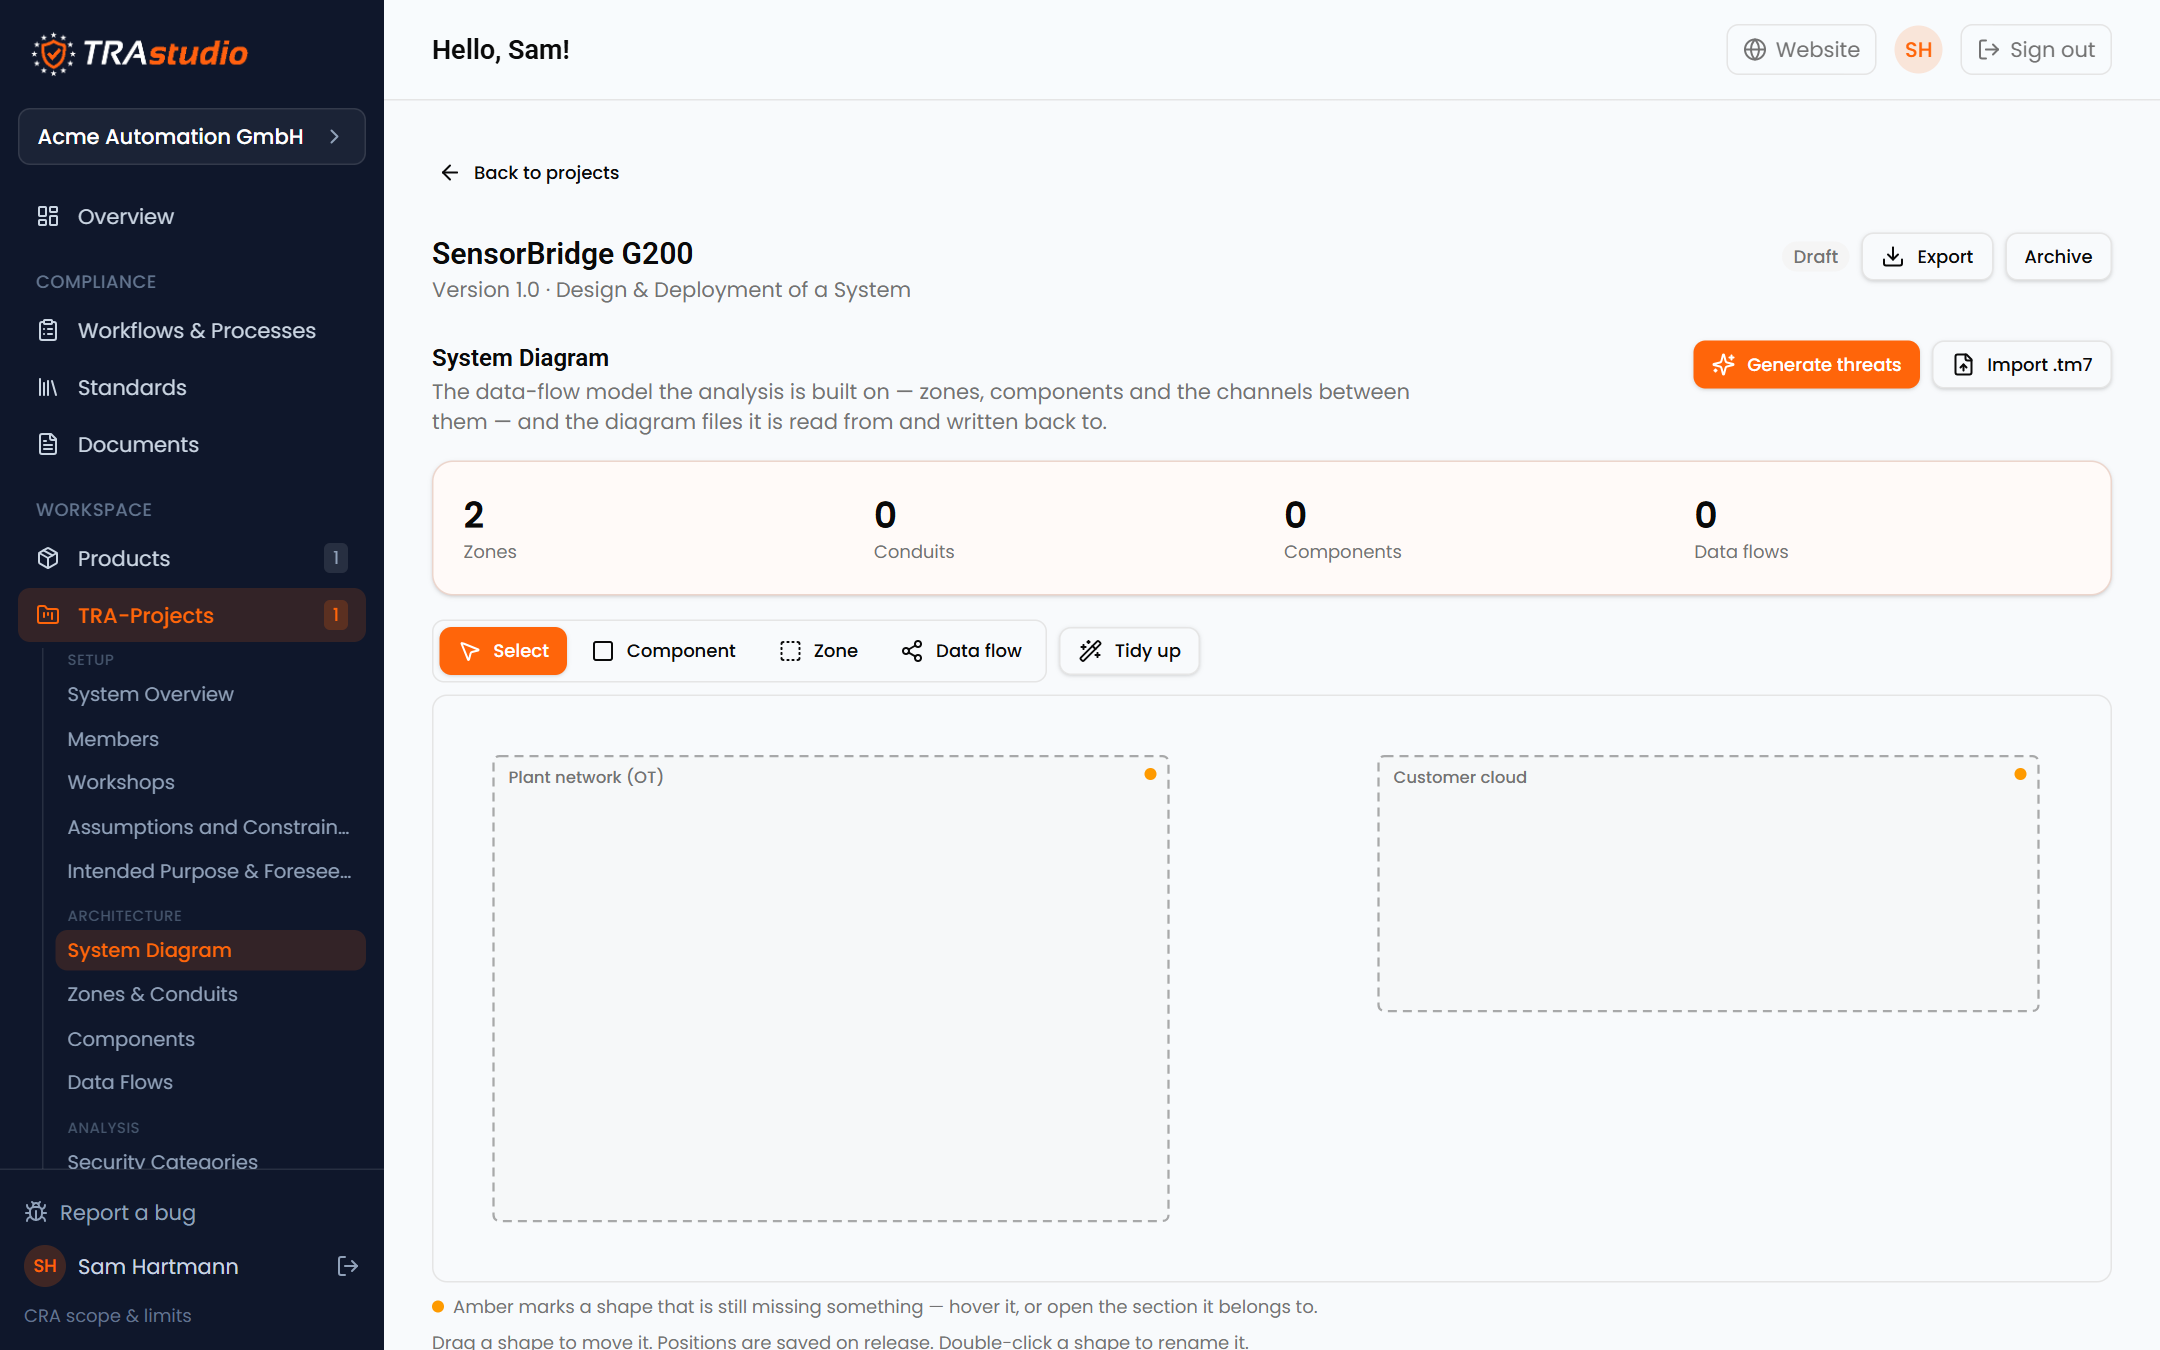
Draw the zones first. Pick the Zone tool and drag a rectangle for each
trust boundary, naming it as you go. We need two: the plant network the gateway
sits in, and the customer's cloud it reports to.
Then place the components. Pick the Component tool and click where each
one belongs. Dropping a component inside a zone joins it to that zone — that is
what puts it behind the boundary. Anything untrusted goes outside every zone,
which is where the service technician's laptop belongs.
Then draw the flows. Pick the Data flow tool, click the component the
flow starts at, then the one it goes to, and name it. Four flows carry this
product: sensor readings in, telemetry out, firmware updates in, and local
configuration over the web UI.
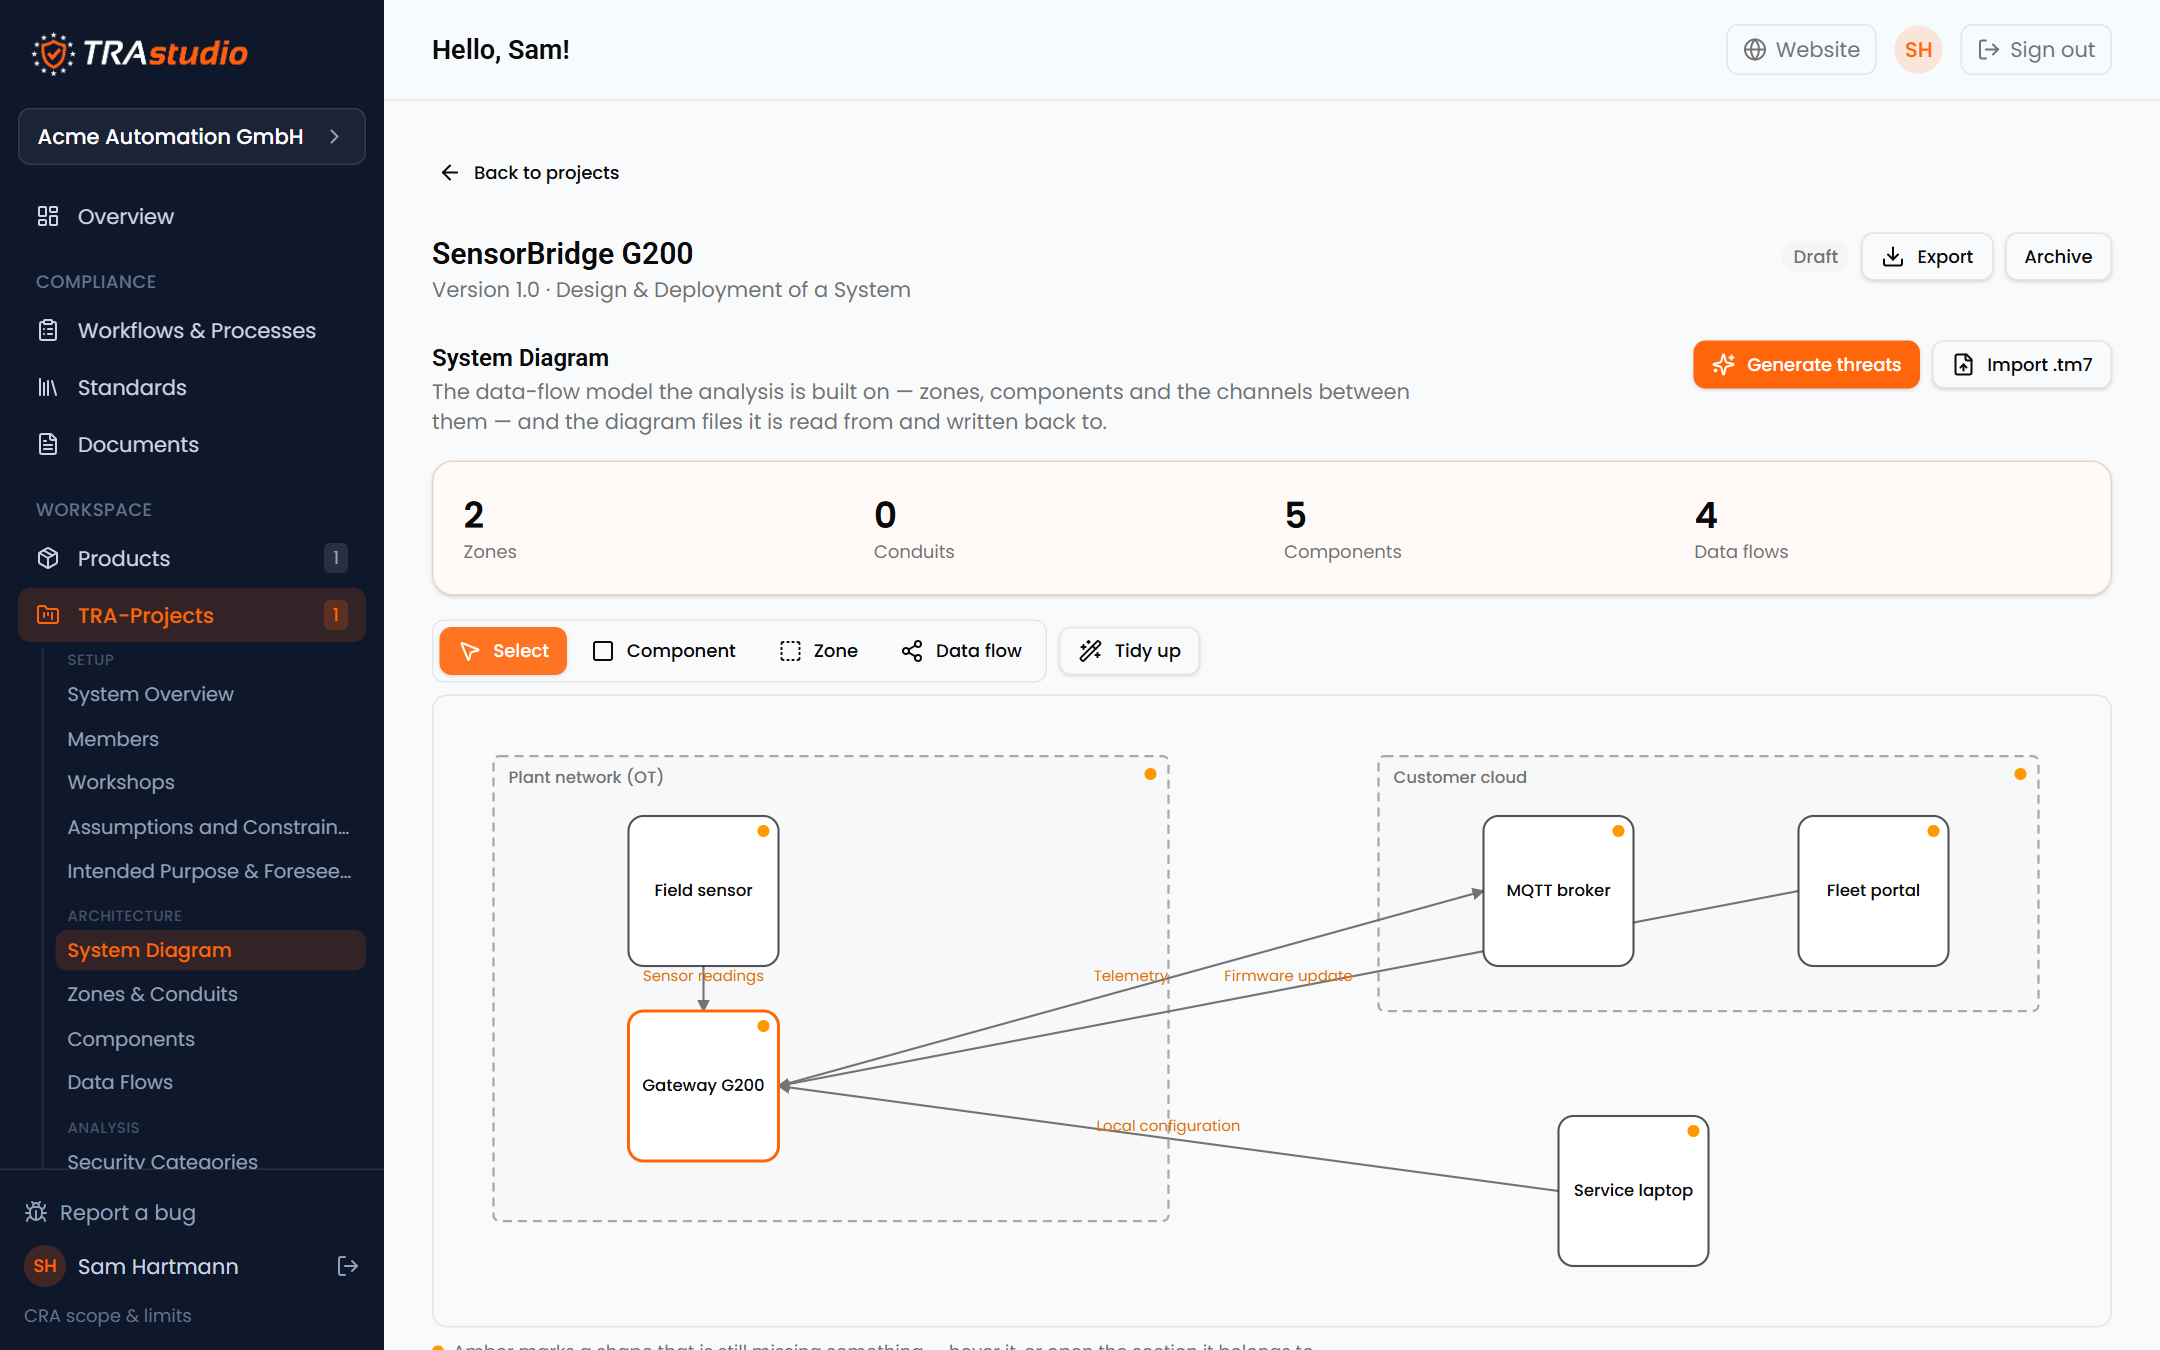
Shapes are dragged into place with the Select tool, and Tidy up
re-arranges the whole diagram if it gets messy. An amber dot marks a shape that
is still missing something — hover it to see what.
Step 5 — Let the tool derive the threats
Choose Generate threats. TRA Studio reads the diagram and proposes one
threat per STRIDE category for every data flow that crosses a trust boundary and
every component at either end of one. Elements that sit wholly inside a single
zone are left alone — no boundary, no question.
The dialog says what it would create before it creates anything, including
what it is leaving out and why.
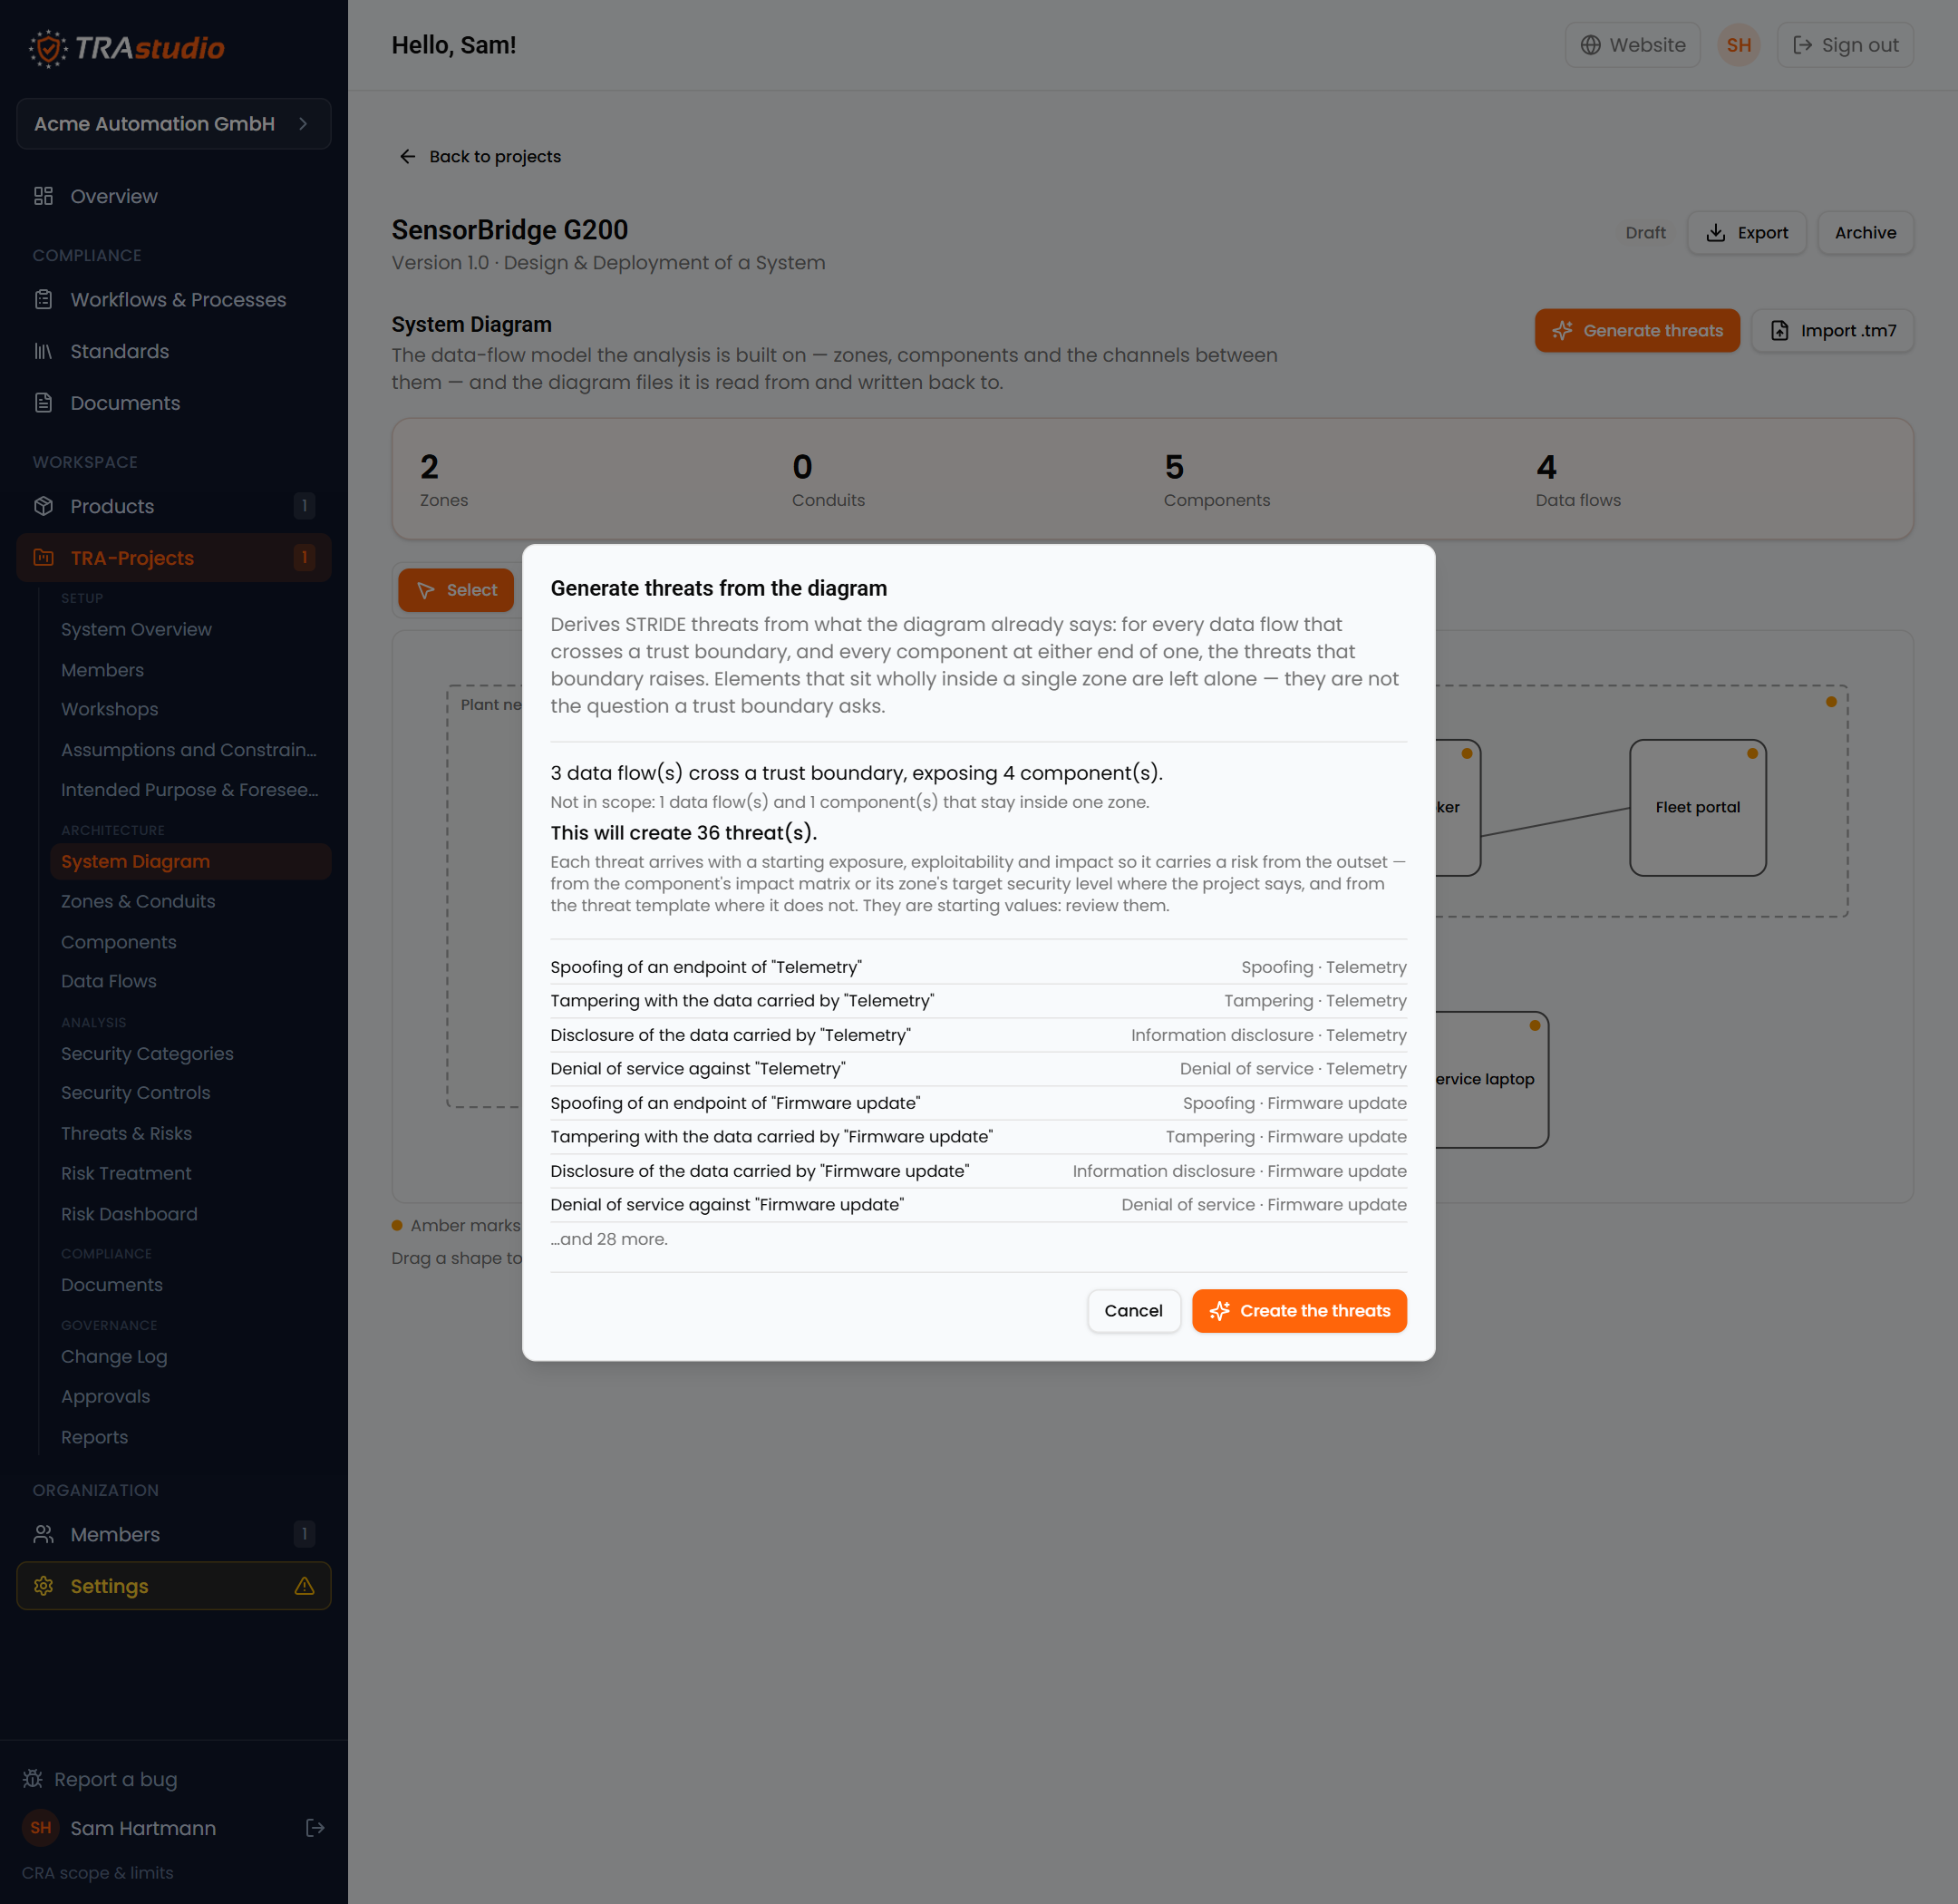
Create the threats. For this model that is 36 of them, each arriving with a
starting exposure, exploitability and impact so it carries a risk from the
outset.
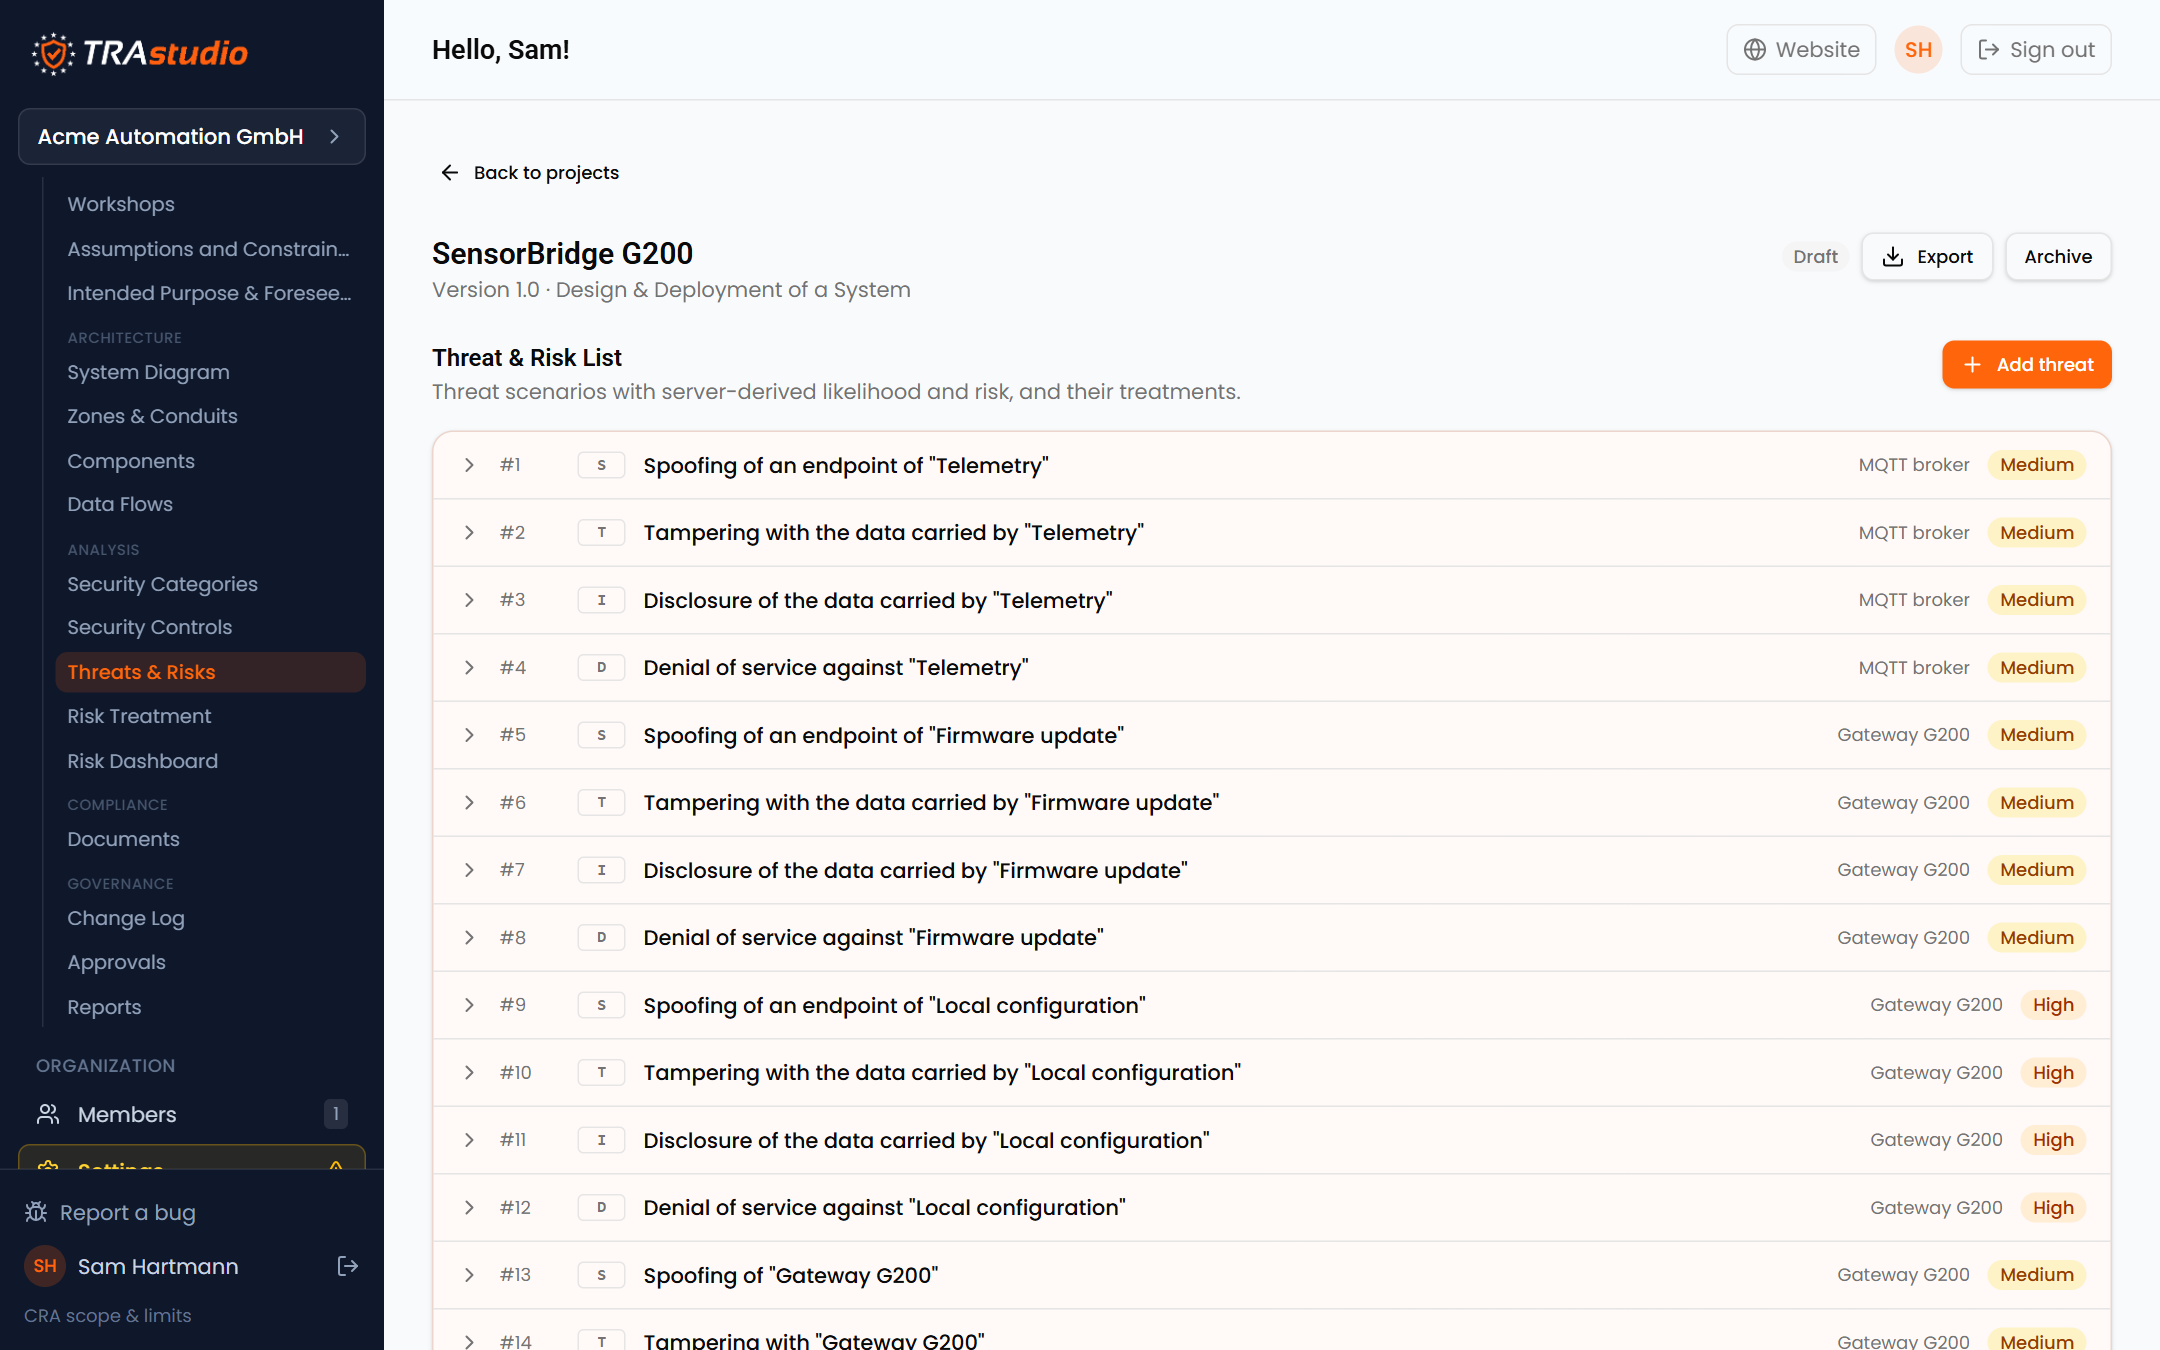
Those numbers are a starting point, not an assessment. The generator knows the
shape of your system; it does not know your product. Which brings us to the next
step.
Step 6 — Rate a threat yourself
Open a threat. We will take
"Tampering with the data carried by Firmware update",
because a forged firmware image is about the worst thing that can happen to a
gateway.
Each threat is rated on three axes:
- Exposure — how reachable the weakness is. The update path faces the customer's network, so: High.
- Exploitability — how hard the attack is to carry out for the attacker type you named. Modifying an update in transit takes a position on the path: Medium.
- Impact — what it costs if it succeeds, on the 1–4 scale. A device running attacker-supplied firmware is 2 — Critical.
Likelihood and risk are computed from those and are not editable: the point of
the scale is that the same scenario scores the same way next quarter. Use the
comment next to each rating to say why you chose it — that comment is what
makes the score reviewable a year from now.
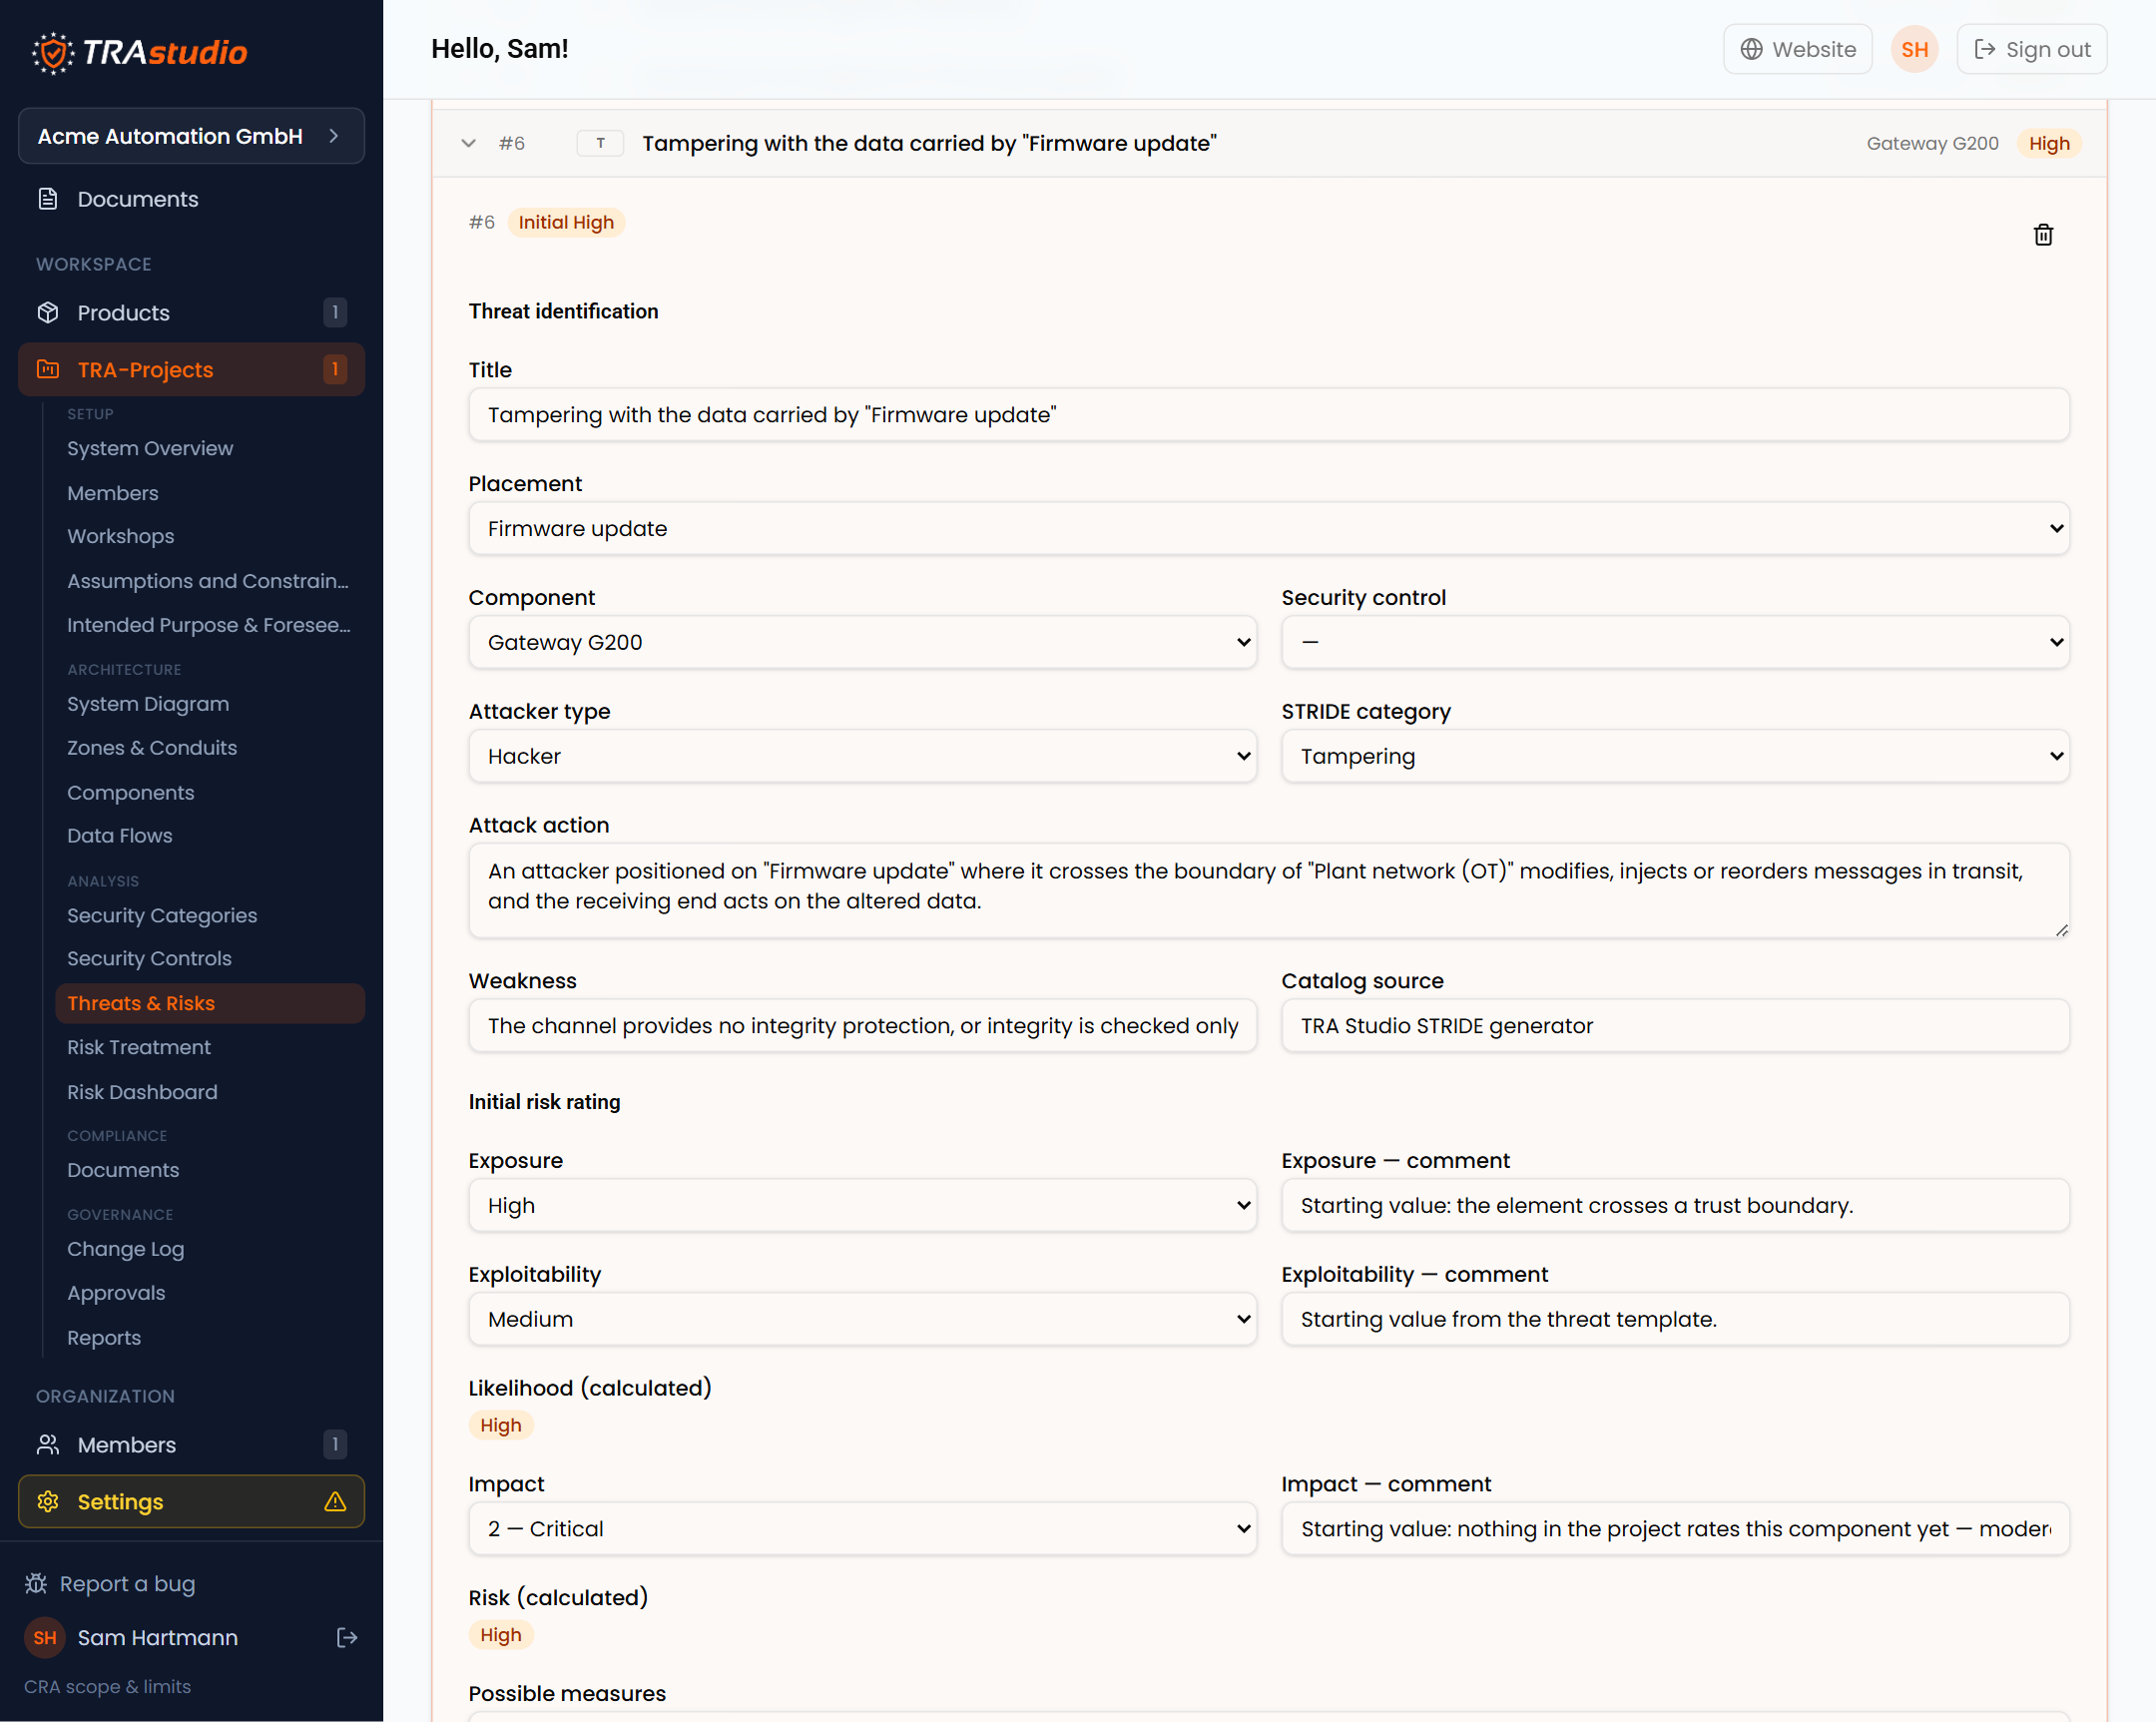
Save. The threat is now rated High.
Step 7 — Decide what to do about it
A rated threat is a question; a treatment is the answer. Choose Add treatment
under the threat.
- Treatment type — Mitigate, Accept, Avoid or Transfer. All four are legitimate outcomes, and a TRA in which nothing was accepted usually means the scoring was steered.
- Description — the measure itself. Ours: sign firmware images with the release key, verify the signature in the bootloader, reject unsigned images and downgrades.
- Owner, progress and dates — who owes it and where it stands.
- Evidence reference — the document or record that proves it, so the treatment points at something outside the tool.
- Residual rating — what is left once the measure is in place. The update path is still reachable, so exposure only drops a step; forging a signed image is what becomes hard, which is exploitability.
Below the form, Answers links the treatment to the security categories and
controls it satisfies — here FR 3 · System Integrity. That link is what later
turns a pile of measures into requirement coverage.
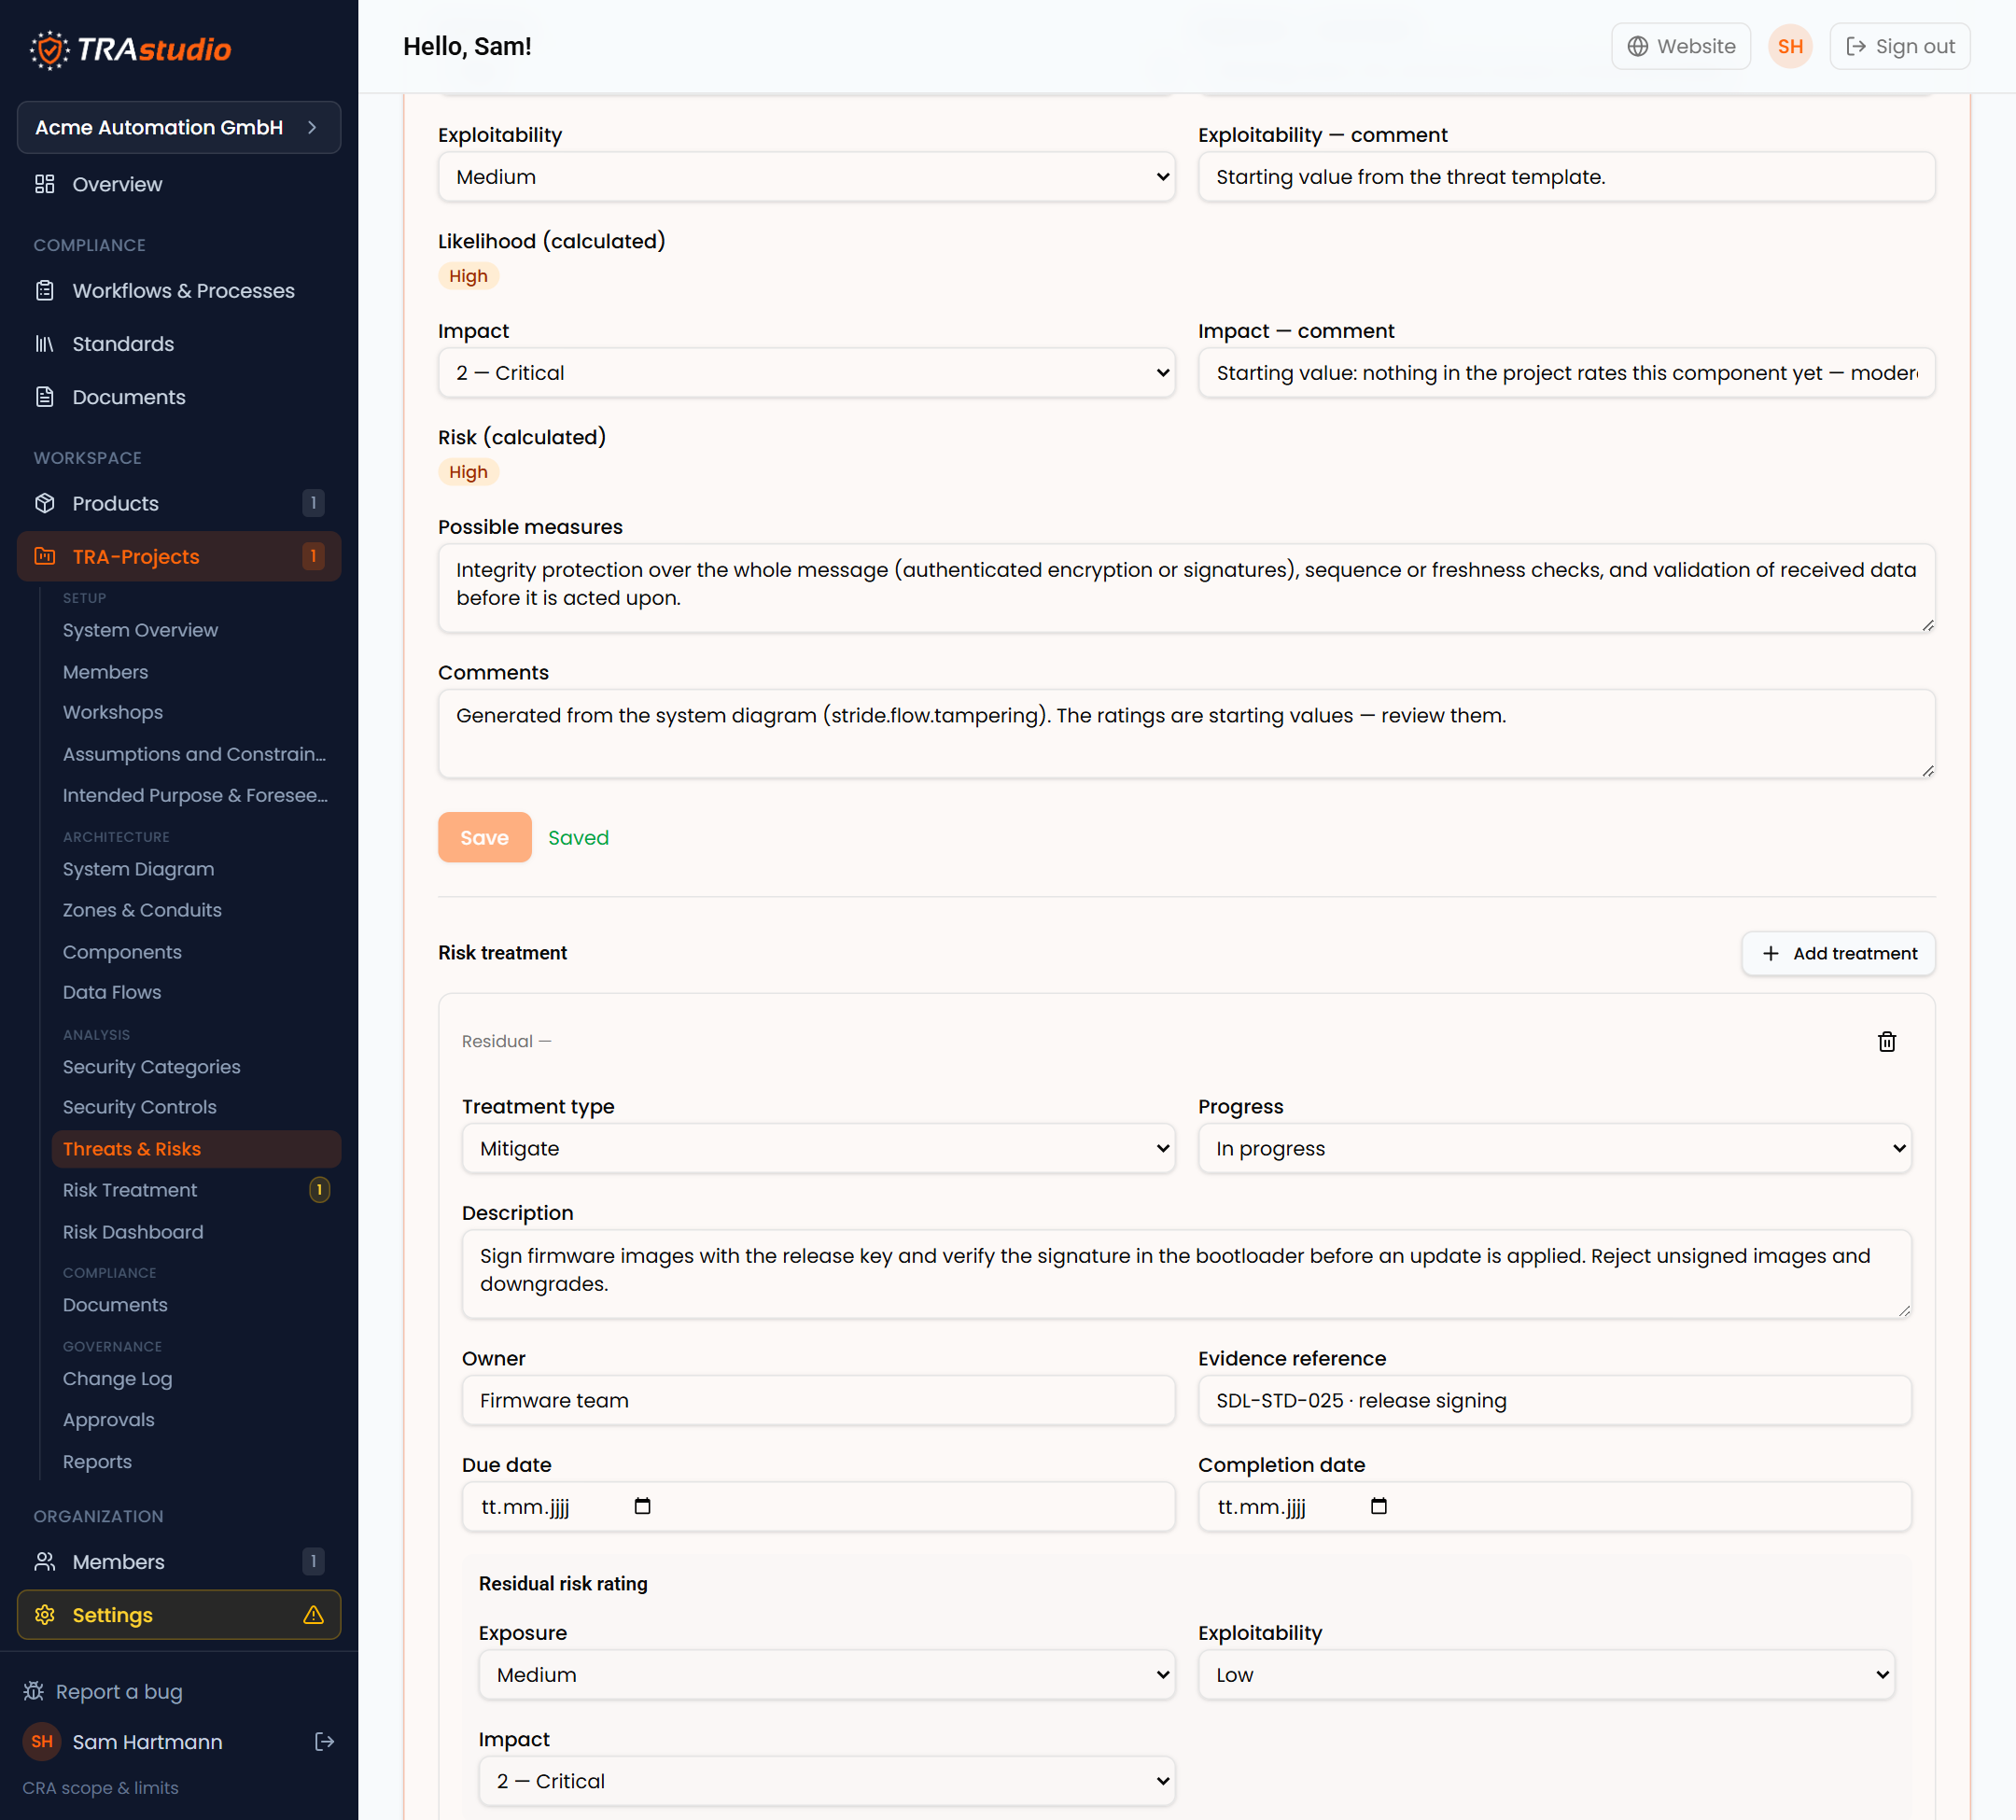
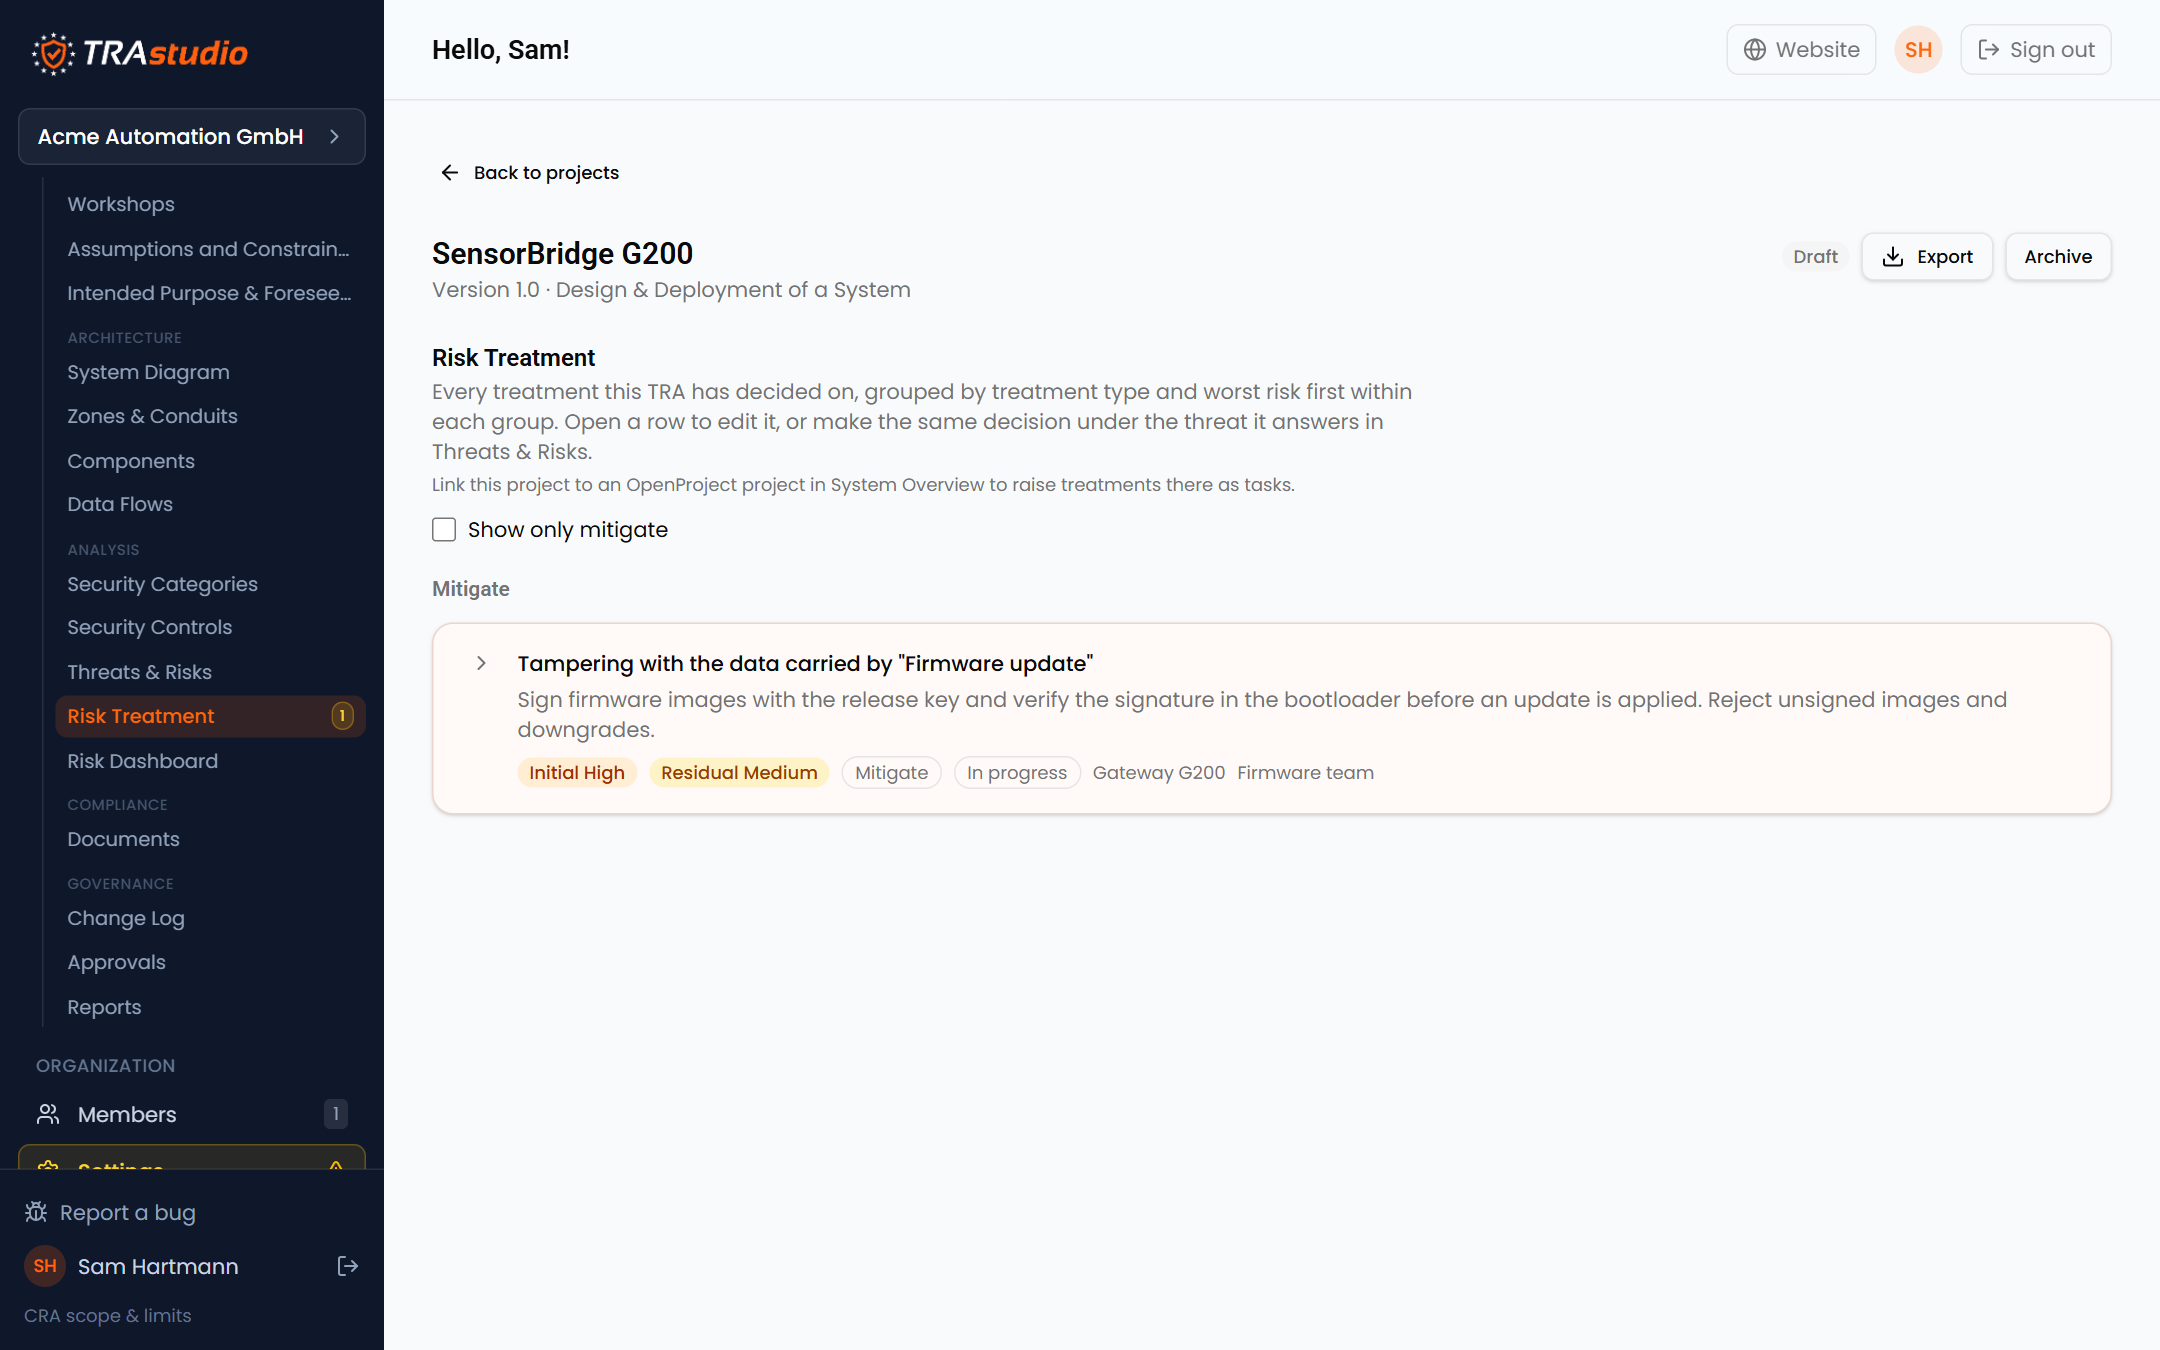
Save it. Every decision of this kind lands in Risk Treatment, grouped by
type and worst risk first — the working list for whoever has to implement them.
Step 8 — Read the risk posture
Risk Dashboard rolls the whole threat list up into two matrices: risk as
found, and risk as it will stand once the treatments are done.
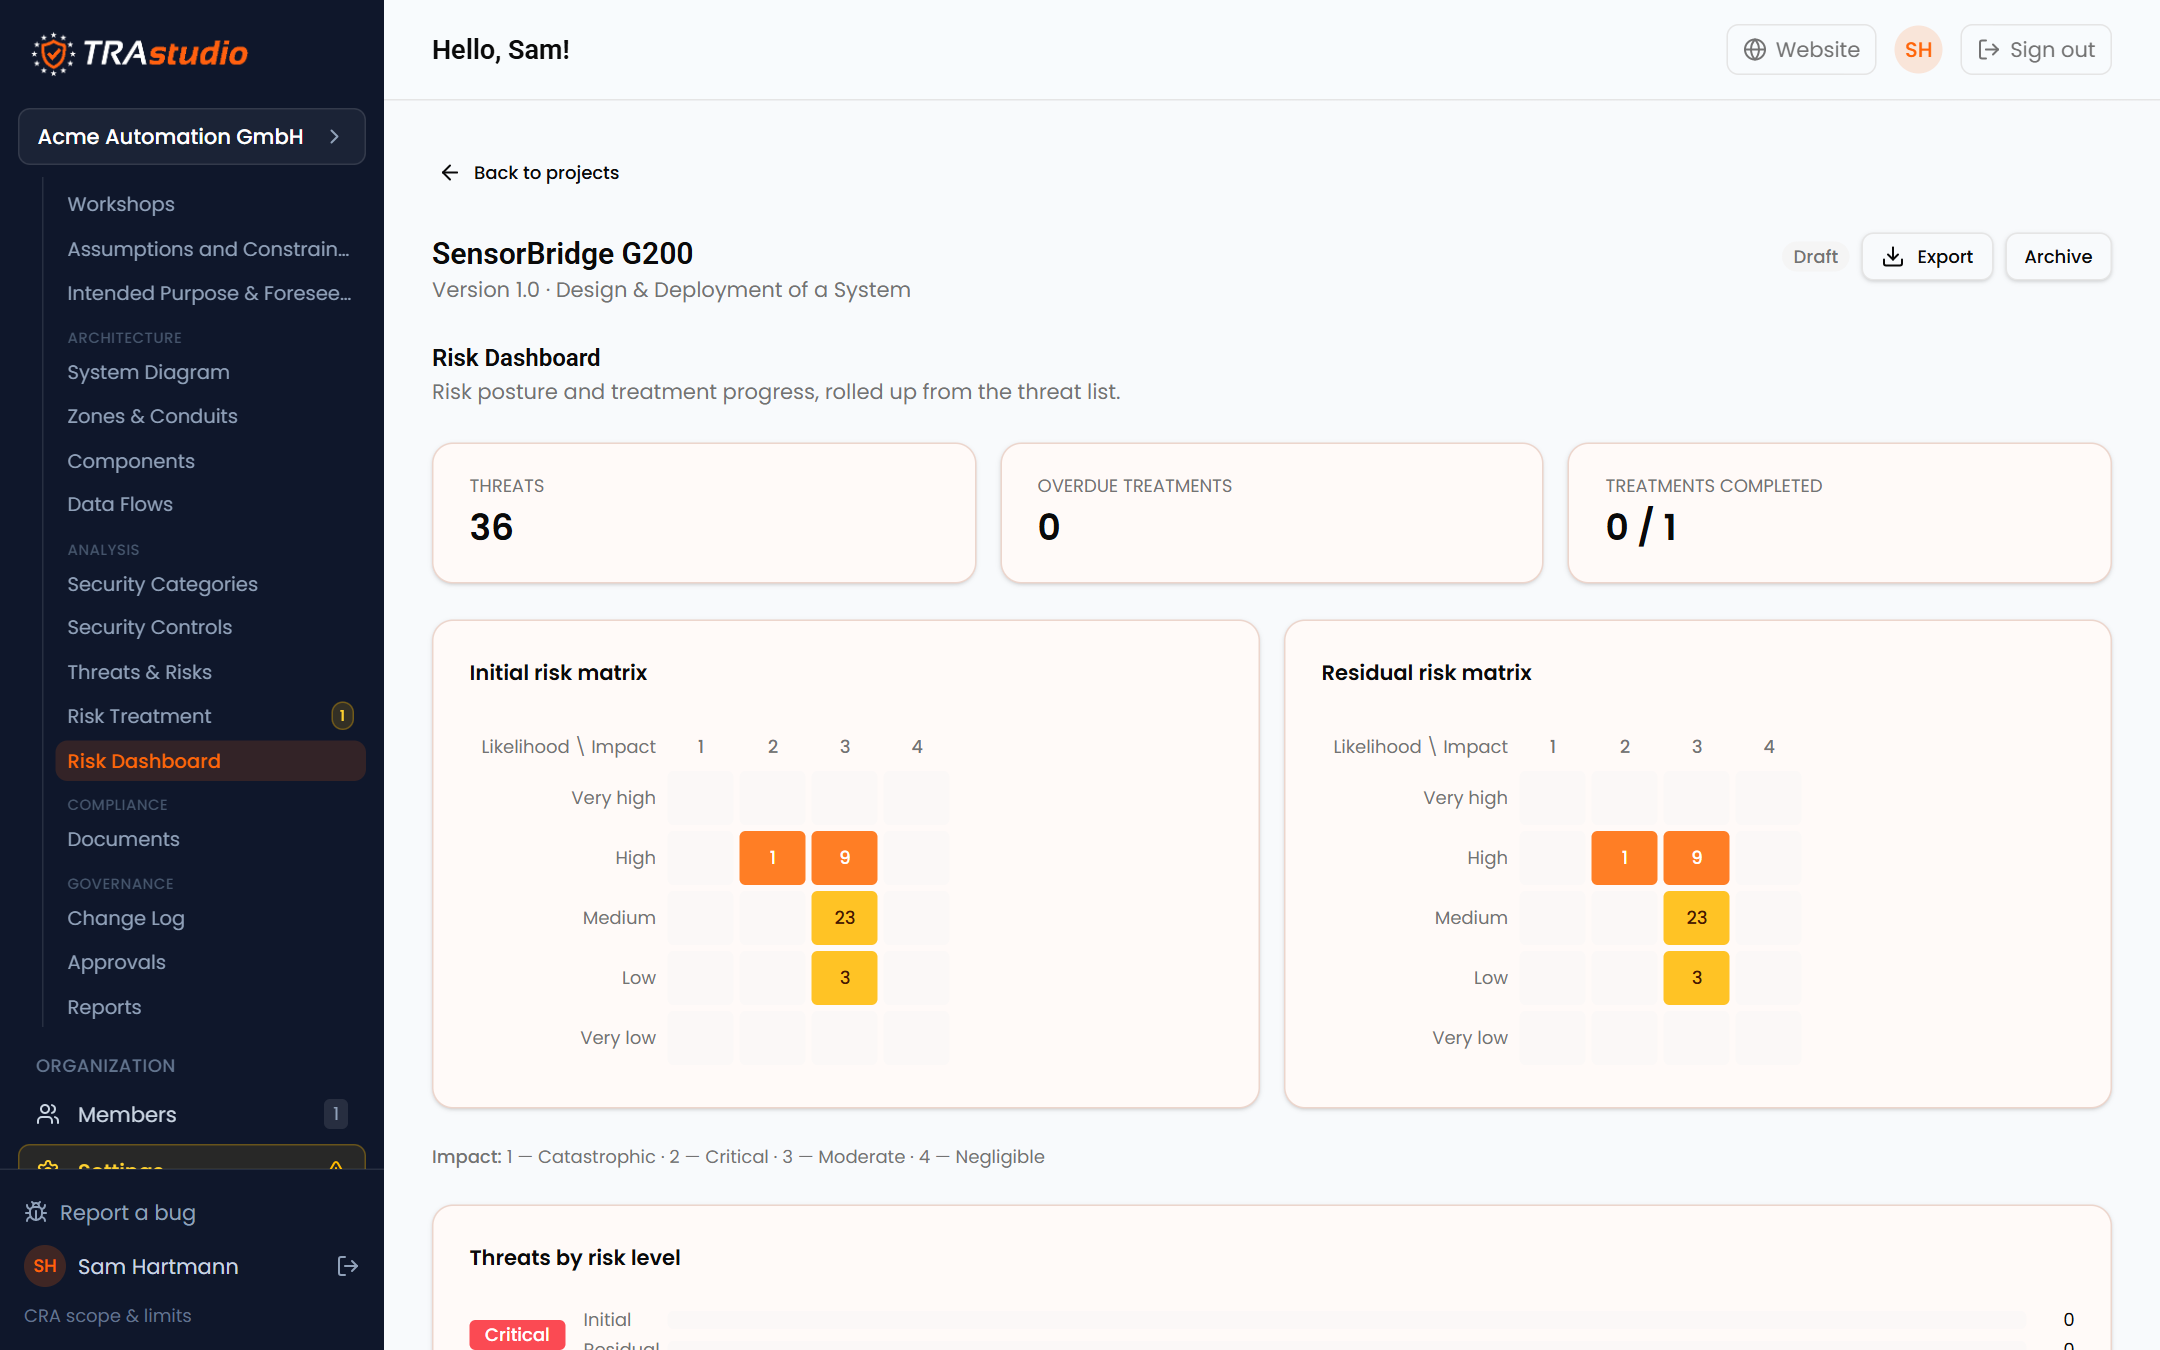
If the two matrices look identical, that is not a bug. Only a treatment marked
Completed moves a threat in the residual view — a planned measure has not
reduced anything yet. Our signing measure is still In progress, so the
residual matrix still carries the original risk. Mark it completed when it
ships, and the picture moves.
Step 9 — Produce the report
Open Reports. Two shapes are available: the full TRA report — scope,
assumptions, components, controls, the complete threat list, the matrices and
the audit summary — and an executive summary for a management review.
Pick a watermark that matches the state of the document (Draft until it is
approved), and use Print / Save as PDF. What you see in the preview is
exactly what prints.
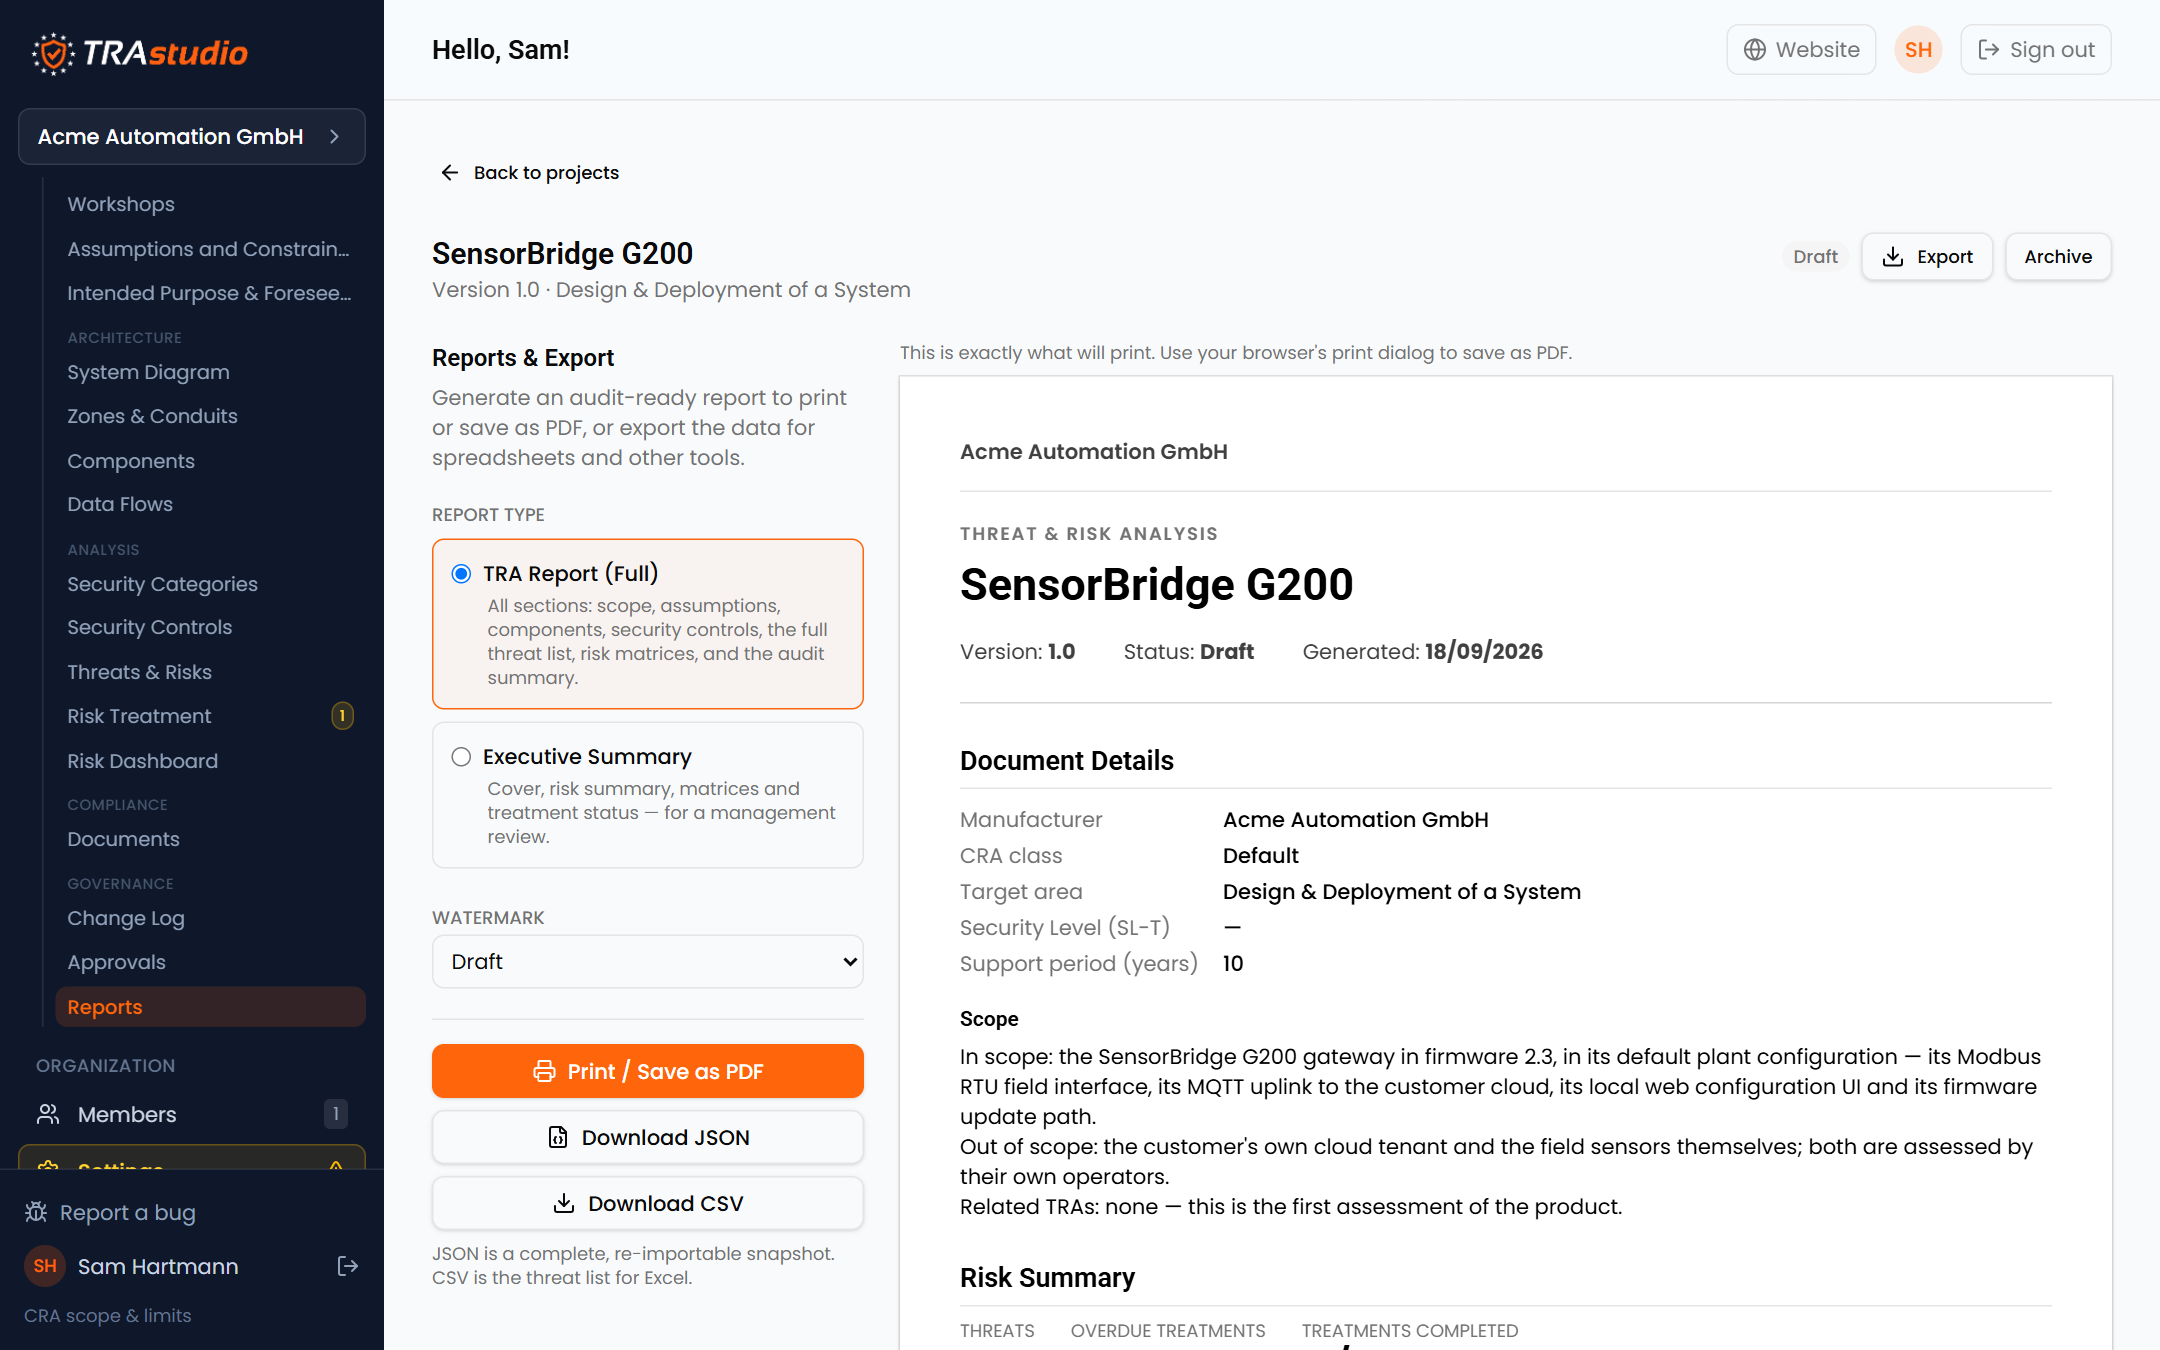
Download JSON is a complete, re-importable snapshot of the project;
Download CSV is the threat list for a spreadsheet.
What you have now
A versioned risk assessment that ties a product to a system model, a rated
threat list, a decision per risk with an owner and evidence, and a report you
can hand to a customer or an auditor.
What it is not yet is released. The remaining path — approvals, sign-off, and
releasing the version so the product's card turns green — runs through
Approvals, and the assessment's real value comes from repeating this loop
early enough in development to still change the design.
Sensible next moves:
- Rate the rest of the threat list, at least the ones the generator marked High.
- Record your Assumptions and Constraints, and the Intended Purpose & Foreseeable Use — both are CRA obligations in their own right and both feed the report.
- Map a standard onto your development process under Workflows & Processes, so the requirements side of the CRA gets the same treatment as the risk side.
This walkthrough is product documentation, not legal advice.
When a walkthrough does not answer it
Write to us — a walkthrough that leaves a question open is a walkthrough we need to fix, and we would rather hear it than not. The community forum is where users compare notes, and a facilitated workshop is the option when the question is about your product rather than about the tool.